Introduction
OpenOCD stands for Open On-Chip Debugger. It is an open-source software that supports debugging a wide variety of chips, devices and boards using a range of supported debug interfaces. If you find a device which is not supported by OpenOCD, being an open-source software, you can add support for that device in OpenOCD yourself and submit patches so that your improvements can be merged into OpenOCD for others to use. OpenOCD is used for debugging as well as in-system programming for embedded target devices. The Numato Lab boards namely, Saturn, Waxwing, Neso, Skoll, Styx and Telesto feature a high-speed USB 2.0 interface which can be connected to FPGA IC’s JTAG signals. So, these can be programmed using their on-board USB interface using OpenOCD, without the need for a separate external JTAG programmer. This article will show how to program Neso Artix 7 FPGA board with a bitstream using OpenOCD. The steps will be similar for other Xilinx FPGA based Numato Lab boards such as Saturn,Waxwing, Skoll and Styx. For programming the Intel (Altera) based Telesto MAX 10 FPGA board using OpenOCD, refer this separate article.
Configuring Neso using OpenOCD
Step 1:
Download and extract the latest Windows version of OpenOCD from its website http://openocd.org to a suitable location in your system.
Step 2:
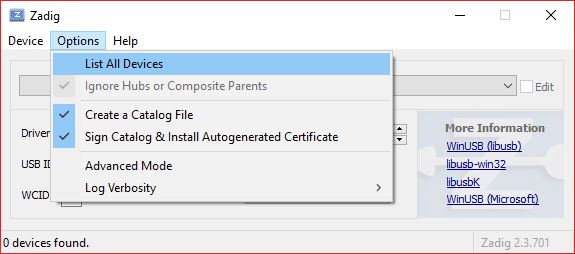
To program Neso through its USB interface, “WinUSB” drivers need to be installed instead of the default drivers installed by Windows. To install “WinUSB” drivers, download and run latest version of “Zadig“. Go to Options and click “List all devices”.
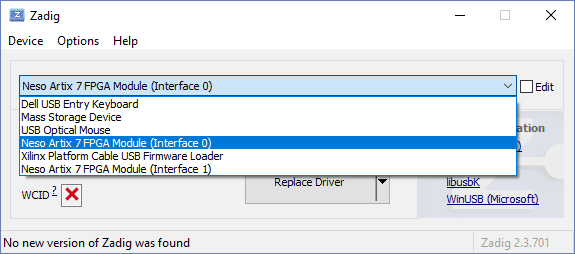
Select “Neso Artix 7 FPGA Module (Interface 0)” as shown in the image below.
Step 3:
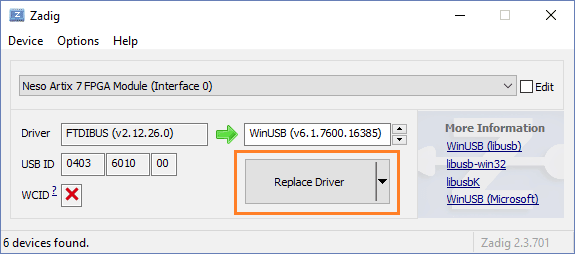
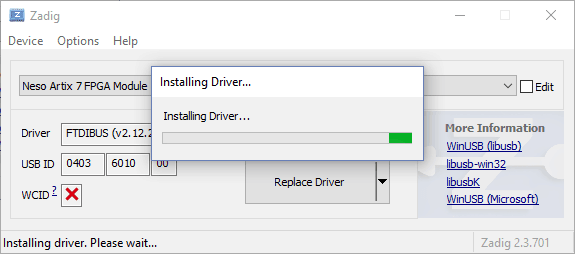
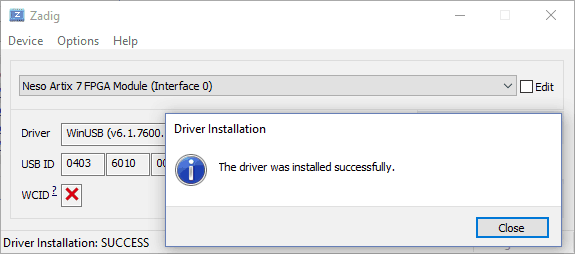
Select “WinUSB” drivers in target driver to replace the “FTDIBUS” drivers. Click “Replace Driver” to install WinUSB drivers as follows.
You will see the following message if driver was installed correctly.
Step 4:
Important: Change the jumpers on header P10 on Neso to JTAG configuration. Refer Neso User Manual on how to configure jumper P10 for JTAG configuration. If, in future, you need to use Neso Configuration Tool to program the SPI flash onboard Neso, change the jumpers back to SPI configuration.
Step 5:
Download and save the numato_neso.cfg file for Neso from here into the “openocd/scripts/board” directory. Open Command Prompt or PowerShell in “bin-x64” folder which is located inside “openocd” folder.
Step 6:
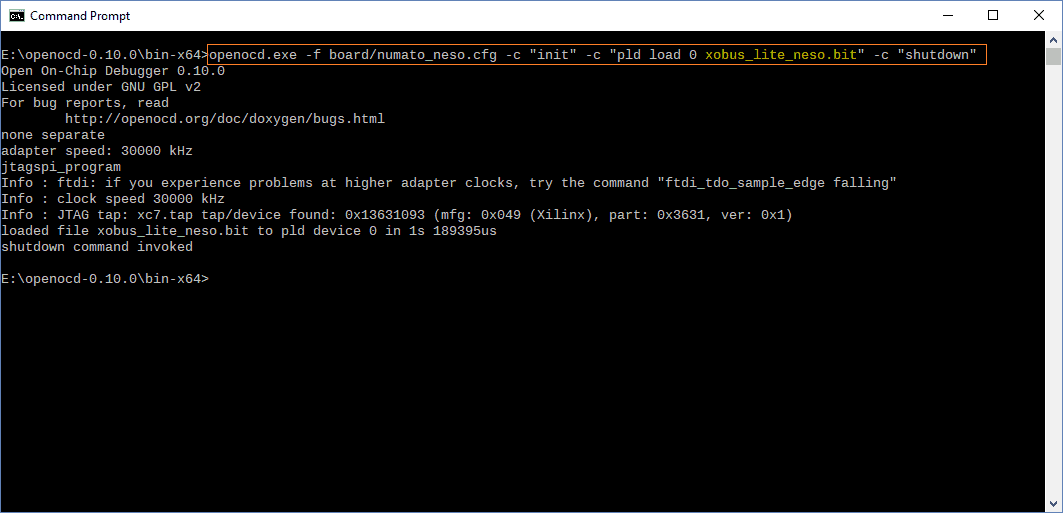
Use the following command in Command Prompt or PowerShell to program FPGA. You need to replace <bitstream file> with the actual location of your .bit file. OpenOCD should show output similar to the image shown below if the programming process finished successfully.
openocd.exe -f board/numato_neso.cfg -c "init" -c "pld load 0 <bitstream file>" -c "shutdown"
Congratulations on successfully programming your bitstream to Neso using OpenOCD, without the need of any external JTAG hardware.
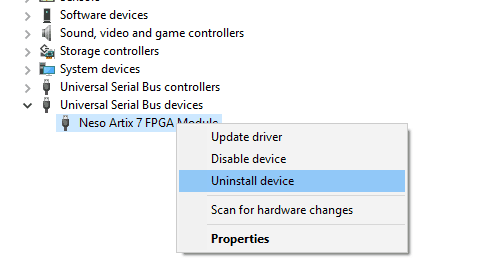
To change the drivers back to FTDI USB drivers follow these steps:
Open Device Manager->Universal Serial Bus Devices, select Neso Artix 7 FPGA Module, right-click and select “Uninstall device”. In the “Uninstall Device” dialog window, select “Delete the driver software for this device.” and click “Uninstall”.

Scan for hardware changes to verify that USB Serial Converter B now comes under “Universal Serial Bus Controllers”.