Introduction
The Mimas A7 FPGA Development Board features a high-speed USB 2.0 interface. So, Mimas A7 can be configured using its onboard USB interface through the Numato Lab Tenagra FPGA System Management Suite. The Tenagra comes with the XVC server support which allows users to program Mimas A7 directly from Xilinx Vivado using the XVC server protocol. In this article, we will show step by step how to program the Mimas A7 board through the XVC server in Tenagra without the need for a separate external JTAG programmer.
Before we jump into the tutorial, let’s go through some details about the Tenagra application and the XVC server.
What is Tenagra?
It is an FPGA System management tool for configuring and communicating with Numato Lab’s supported FPGA modules and development platforms. This software is designed to be a single interface for managing the devices and exercising some of the available features. Currently, Tenagra supports configuring the FPGA module/board (programming). With Tenagra, you can create multiple configuration setups with different bitstreams and settings for each device model so that switching between multiple bitstreams becomes a very simple process. This is especially helpful during development where the device may need to be reprogrammed with various bitstreams repeatedly.
What is the XVC server?
As stated in Xilinx’s official page, Xilinx Virtual Cable (XVC) is a TCP/IP based protocol that emulates JTAG protocol and acts like a JTAG cable over a network. Xilinx Virtual Cable provides a way to access the JTAG chain on the target FPGA board and debug the target without the need for a physical officially supported JTAG cable.
Prerequisites:
- Hardware:
- Mimas A7 FPGA Development Board
- USB 2.0 B-type cable
- 5V-12V DC Power Supply
- Software:
- Xilinx Vivado Design Suite 2023.2.1
- Tenagra Application
Let’s get started
Before starting please visit the Tenagra Product Page and download the installer for your operating system. Extract the zip file and run the installer. Follow the steps as prompted by the installer to complete the installation.
Step 1 :
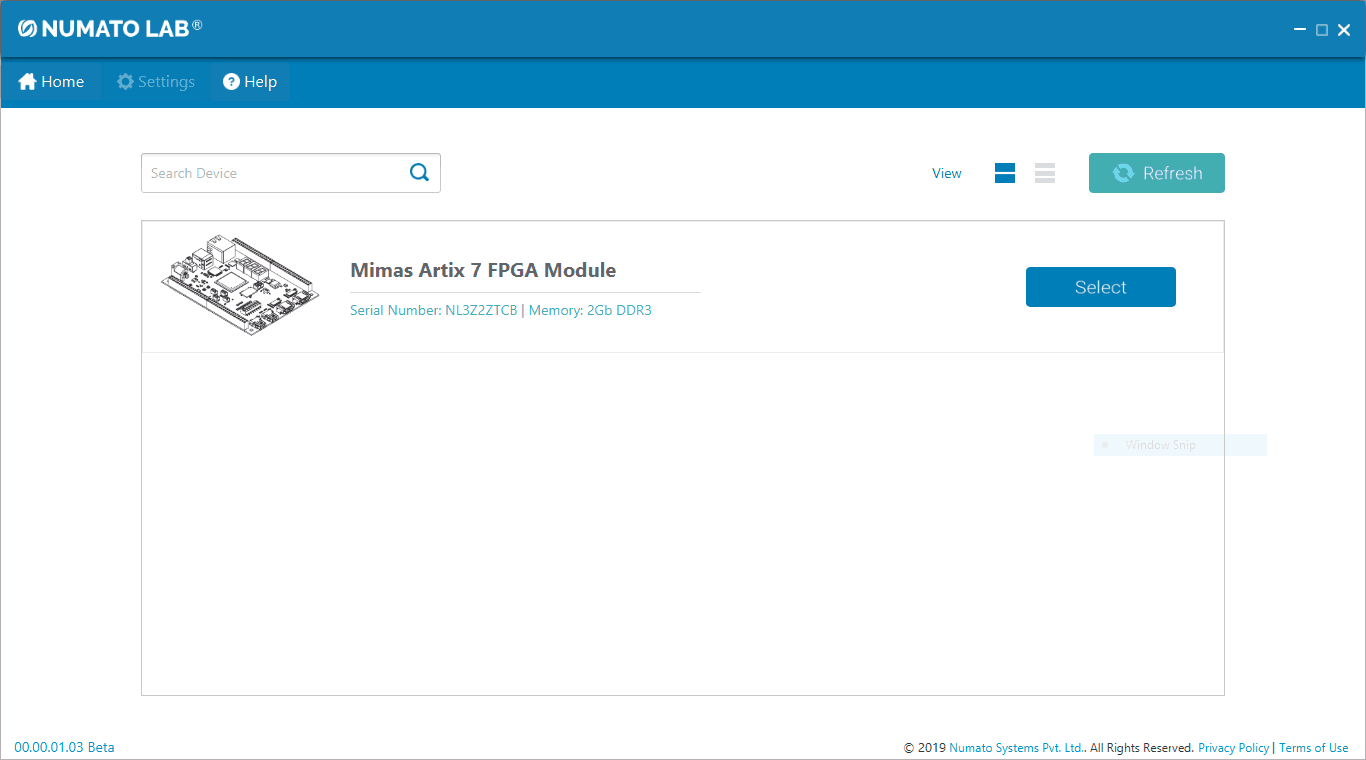
Check your operating system’s program menu for the Tenagra icon. Click the Tenagra icon to launch the application. Now connect the Mimas A7 board using a USB 2.0 B-type cable to the system. If the board is detected by Tenagra, it will display the board on the main page.
Step 2:
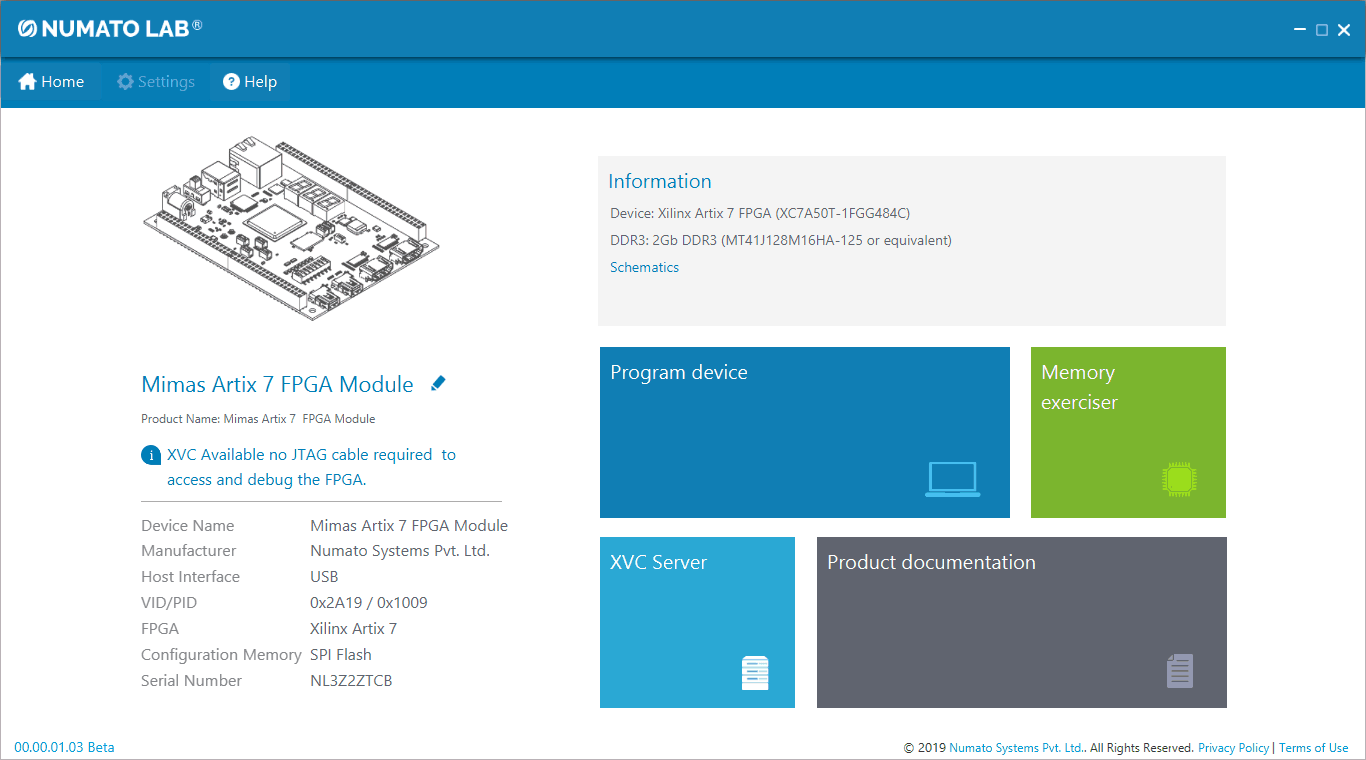
To view details of the board, click on the “Select” button present alongside the device name. On the next page (i.e., Device Information page) you will see all the details of the board and features of the Tenagra application (i.e., Program device, Memory exerciser, and XVC Server).
Step 3:
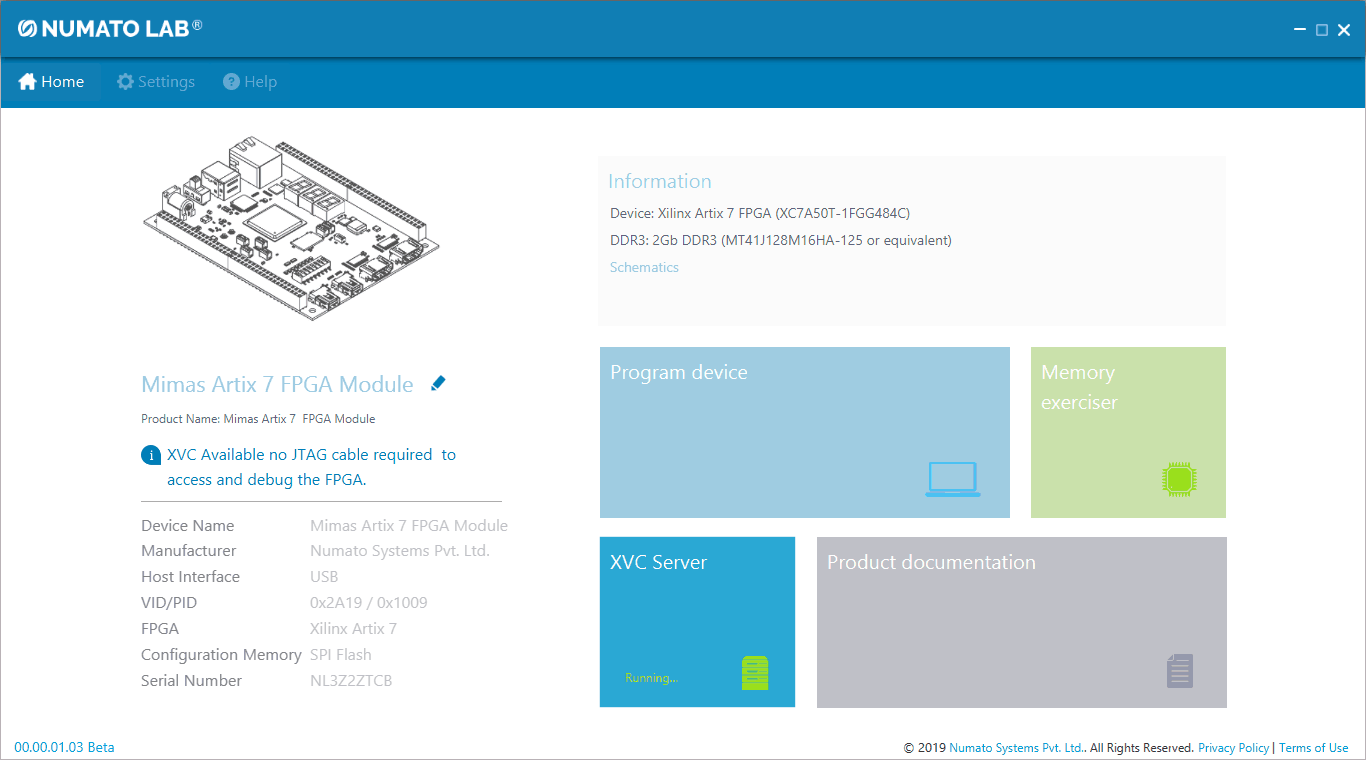
To get started with XVC Server, in the Device Information page, click the “XVC Server” button. Once you click the XVC Server button, you will see a status message that says “Running”.
Step 4:
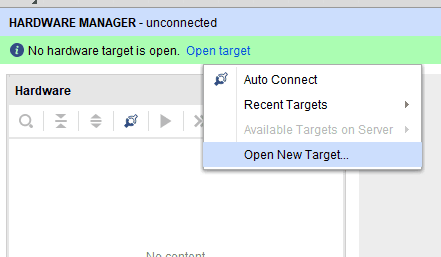
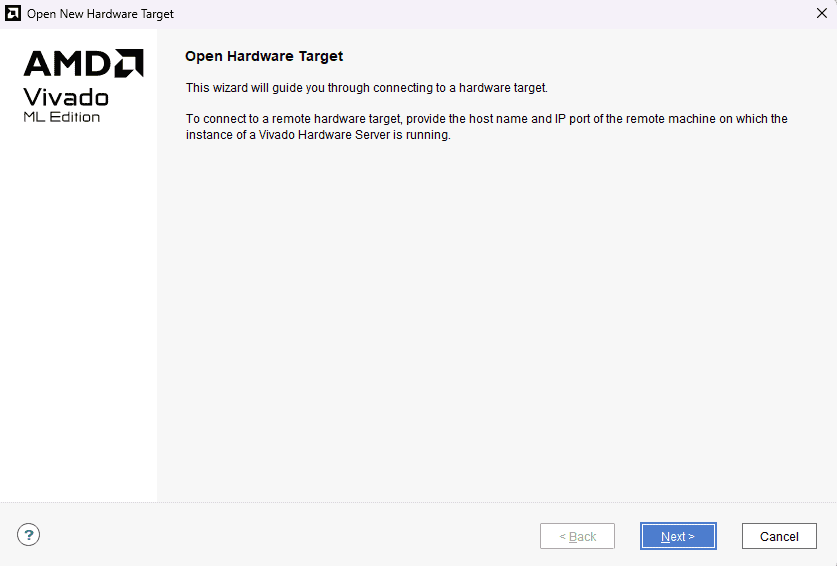
To program through the XVC server using Vivado as a client, open Vivado -> Hardware Manager -> Click on “Open target” and select “Open New Target”. You will get the “Open New Hardware Target” wizard, click “Next” to proceed.
Step 5:
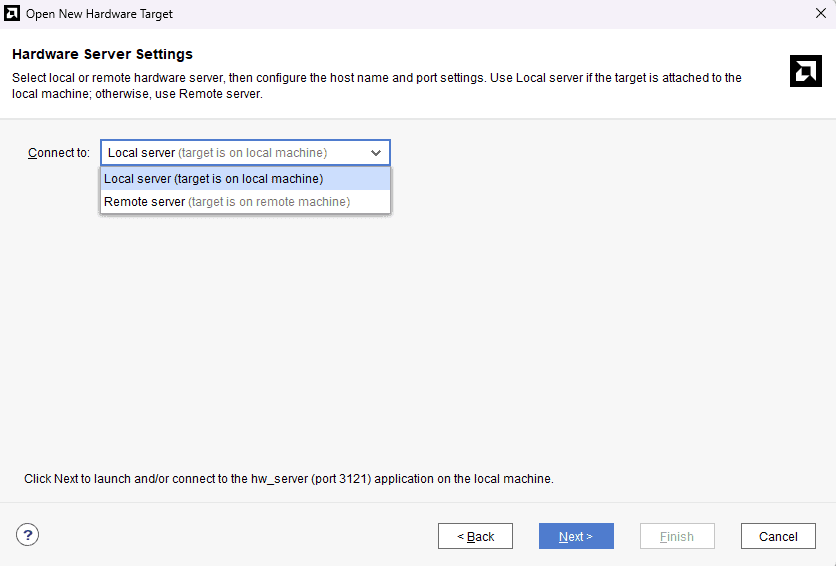
Under the Hardware Server Settings, connect to the Local server or Remote server. You need to select “Local server” option if the Vivado Hardware server is running in the local machine (most common usage) otherwise, select Remote server and click “Next”.
Step 6:
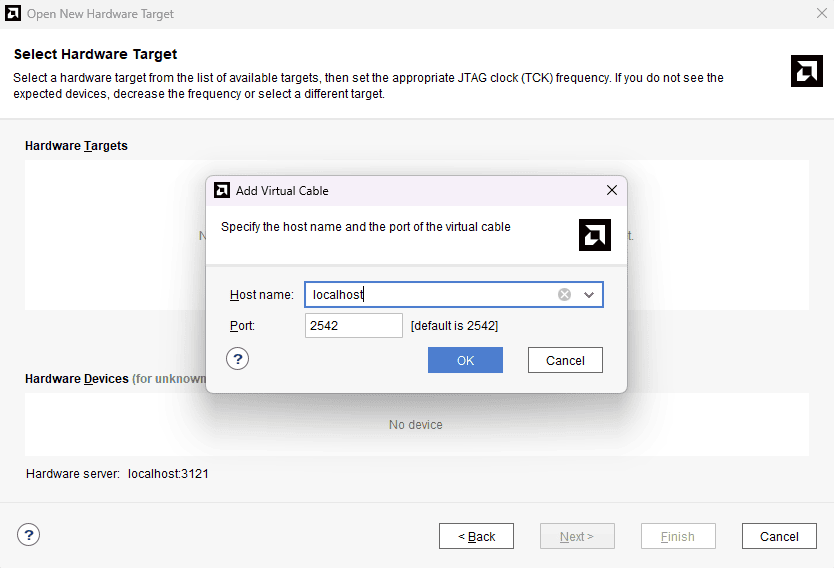
In the next wizard click “Add Xilinx Virtual Cable ( XVC )” and enter the Host Address of the system/machine in which target is connected, leave the Port Number as 2542 and click “OK”.
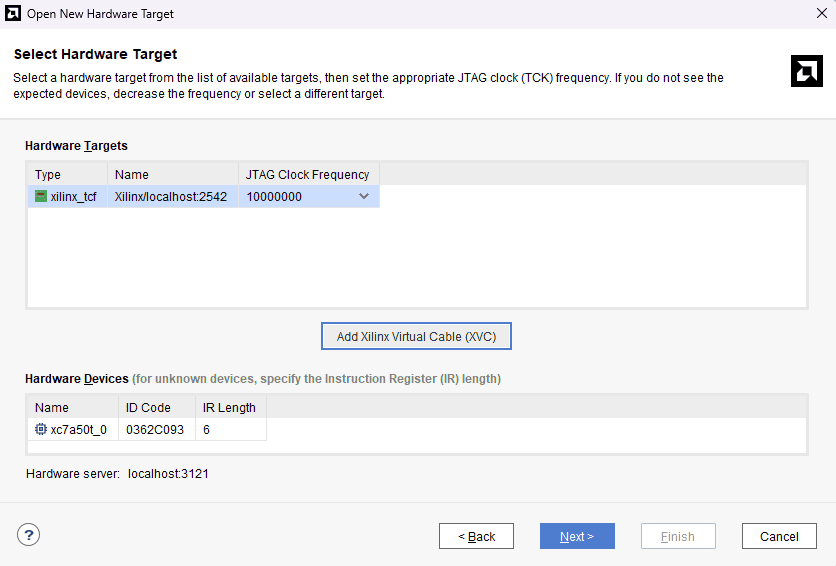
If the target is added successfully, you will be able to see the added target as shown in the image below. Click “Next”.
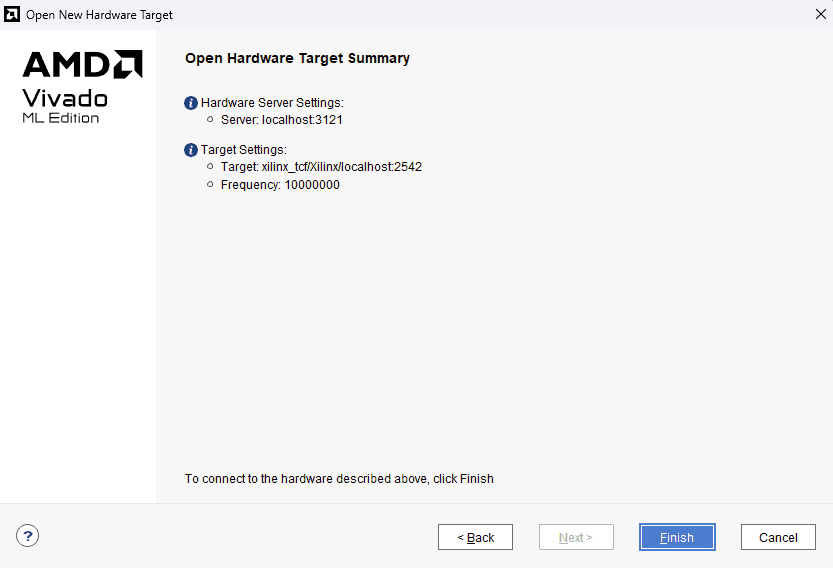
In the next window, you’ll get the summary of the hardware selected as shown in the image below. Click “Finish” to connect to the target.
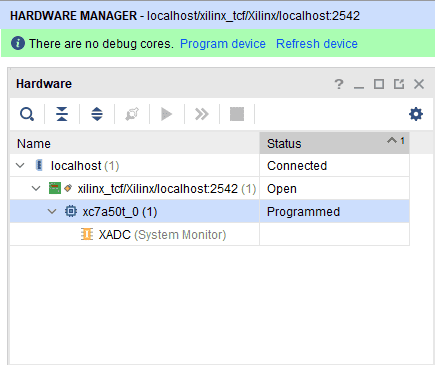
Once you click “Finish” you should get the Mimas A7 device in the Hardware section as shown in the image below.
Step 7:
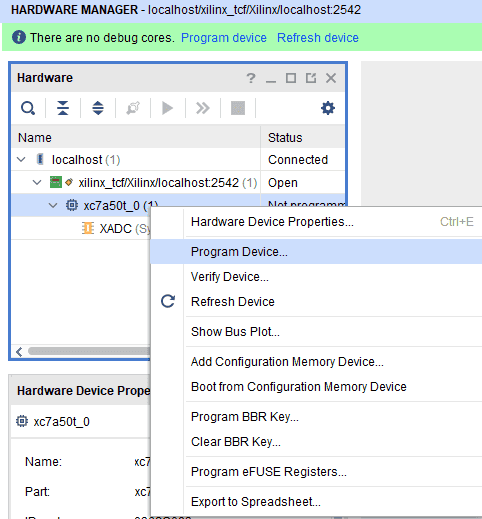
Right click on the “xc7a50t_0” device and select “Program Device”.
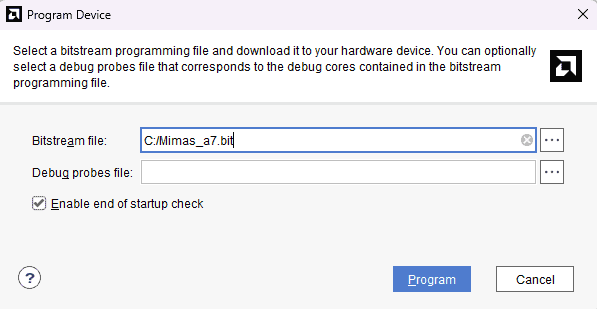
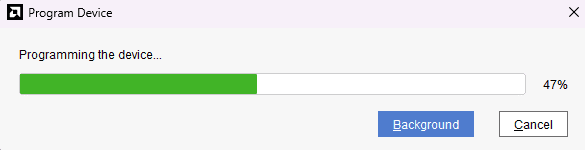
Find the MimasA7 bitstream file that you wish to program to the board and click “Program”.
Congratulations you’ve just successfully programmed your bitstream to the Mimas A7 board through the XVC server using Tenagra, without the need for any external JTAG hardware.