Introduction
The Mimas A7 Mini FPGA Development Board features Artix 7 FPGA and a high-speed USB 2.0 interface based on FTDI FT2322H. So, Mimas A7 Mini can be configured using its onboard USB interface and the Tenagra application. The Tenagra application has the XVC Server feature which helps us to program Mimas A7 Mini module using XVC Protocol, without a physical JTAG Cable. In this article, we’ll learn the specific steps to program Mimas A7 Mini through the XVC Server in Tenagra without the need for a separate external JTAG programmer.
If you’d like to get more information on the capabilities of Tenagra, please go to this link. If you’d like a detailed description of the XVC, please refer to this page.
Prerequisites:
Hardware:
- Mimas A7 Mini FPGA Development Board
- USB A to Micro USB cable
Software:
- Xilinx Vivado Design Suite 2023.2.1
- Tenagra Application
Let’s get started
Before starting please visit the Tenagra Product Page and download the installer for your operating system. Extract the zip file and run the installer. Follow the steps until you have completed the installation.
Step 1 :
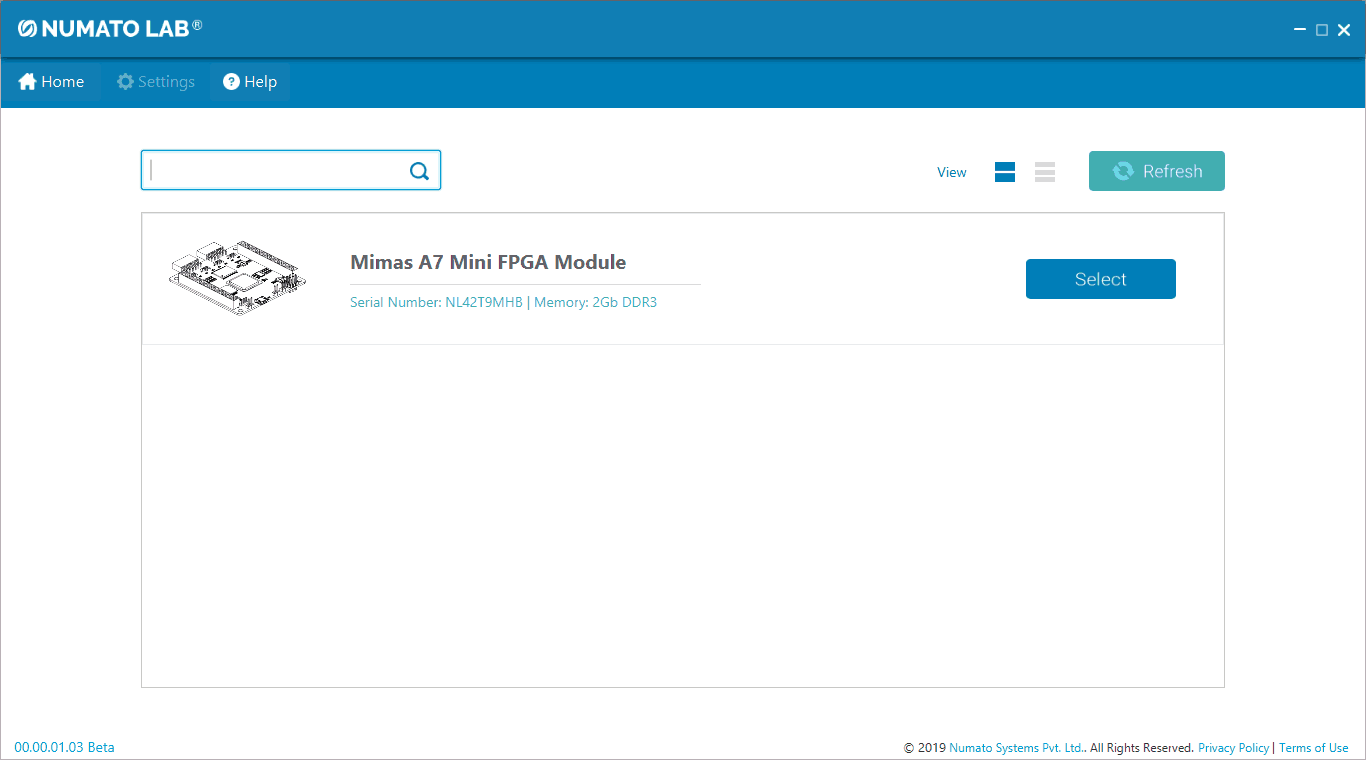
Launch the Tenagra application and connect the Mimas A7 Mini board using the Micro USB cable to the system. Once the connection is established, the board will be detected by Tenagra and it will display the board on the main page.
Step 2:
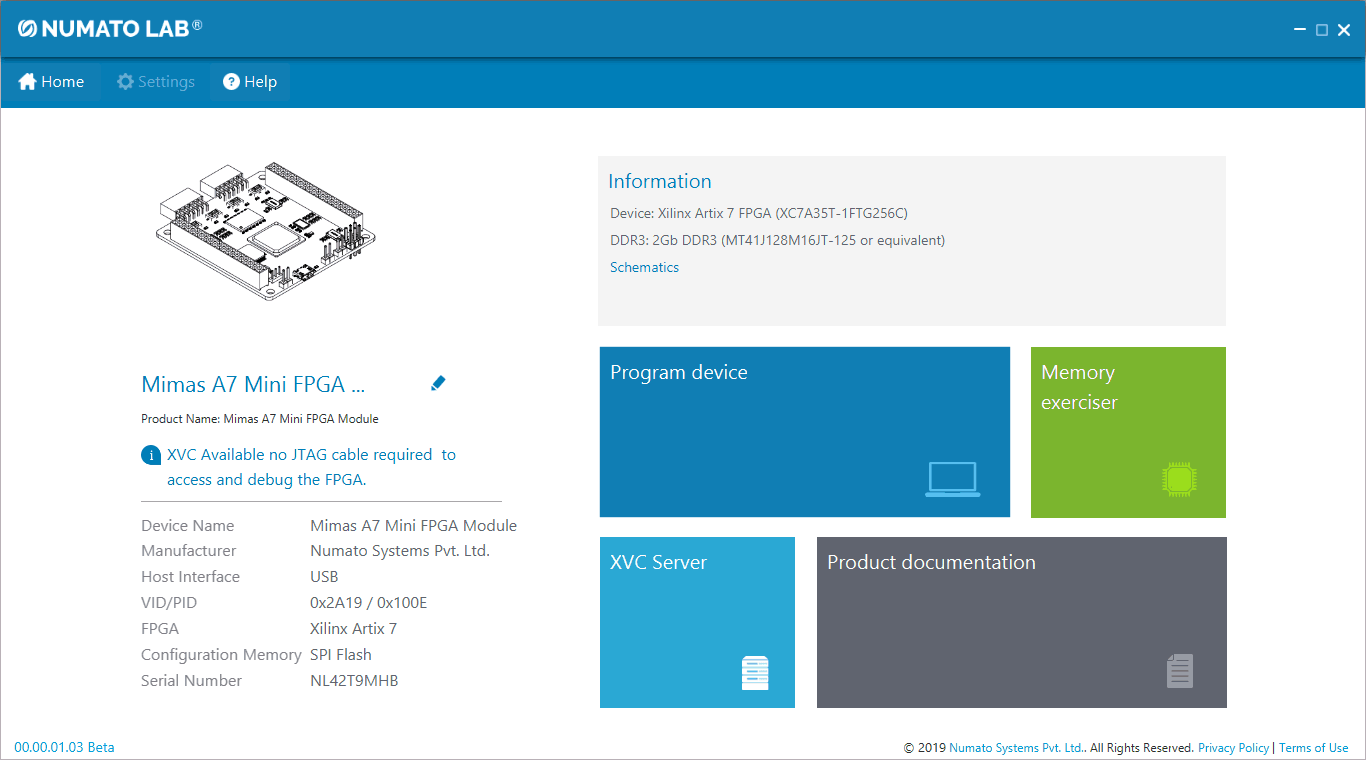
Click “Select” to open the corresponding device. On the next page (i.e., Device Information page) we can observe the details of the board and features of the Tenagra application (i.e., Program device, Memory exerciser, Product documentation, and XVC Server).
Step 3:
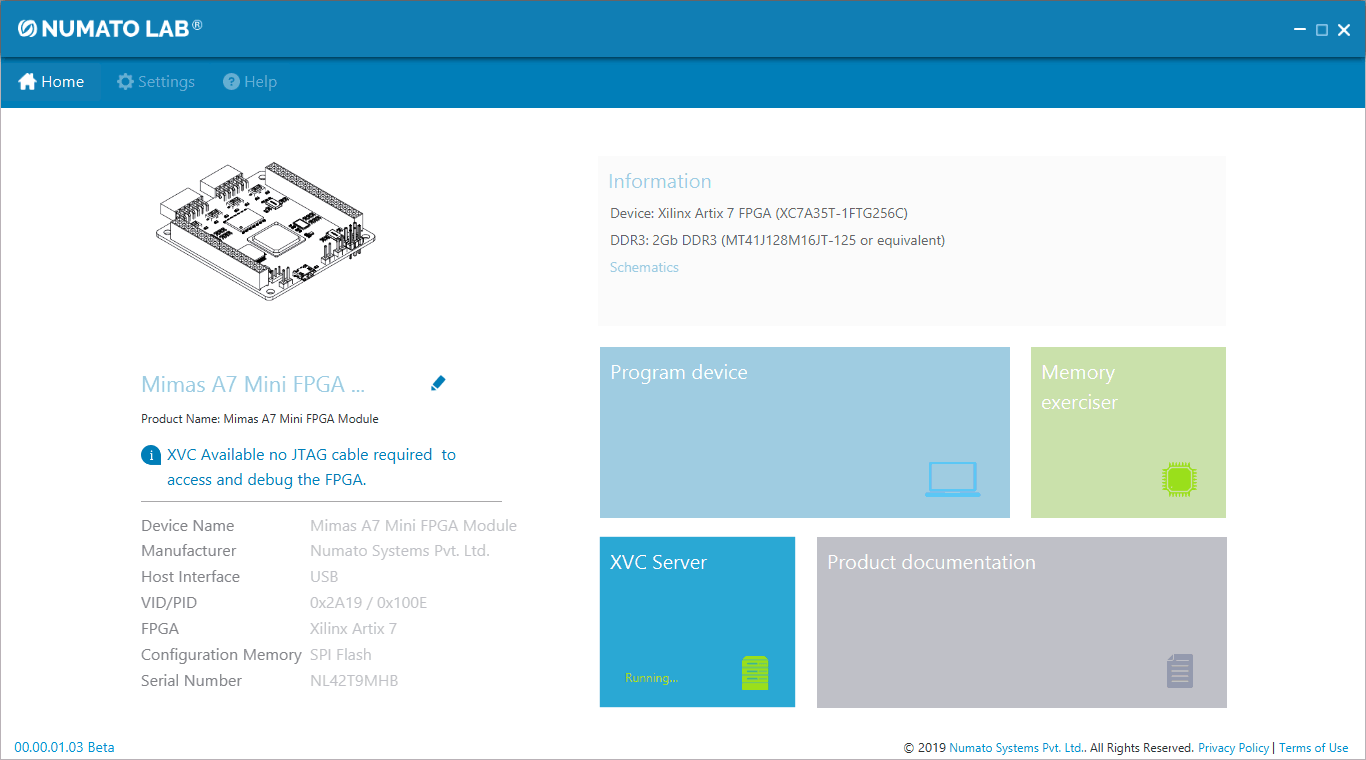
To get started with XVC Server, in the Device Information page, click the “XVC Server” tab. Once the XVC Server has started, we can observe the status as “Running” in the tab, as shown in the following image. Now the XVC Server is ready and we can program the Mimas A7 Mini.
Step 4:
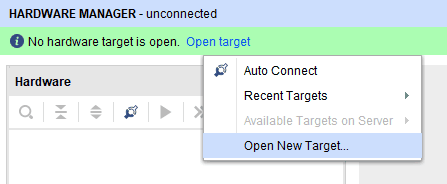
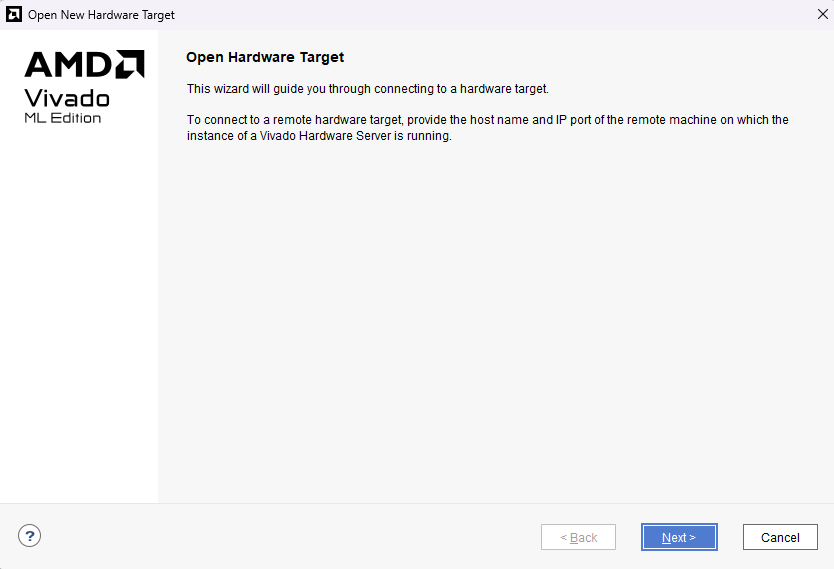
To program through the XVC Server using Vivado as a client, open “Vivado->Hardware Manager”. Click “Open target” and select “Open New Target”. We will get the “Open New Hardware Target” wizard, click “Next” to proceed.
Step 5:
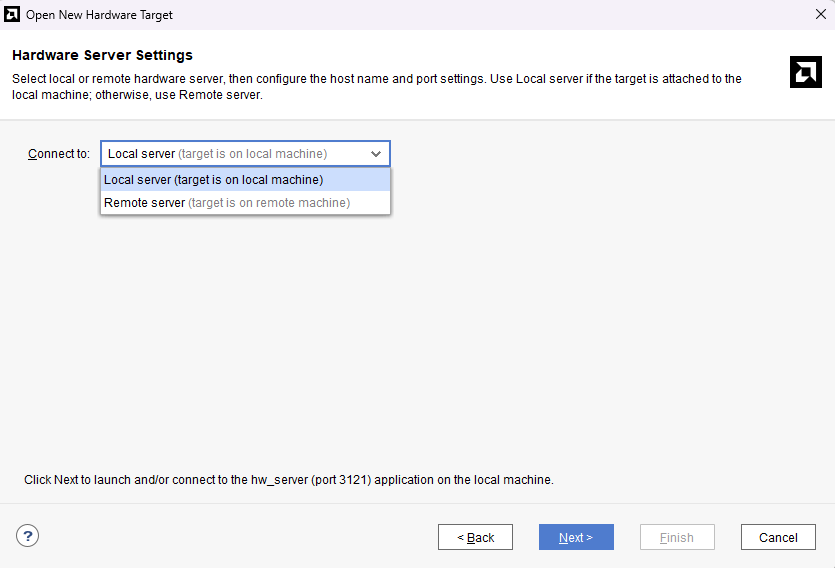
Under the Hardware Server Settings, connect to the Local server or Remote server. Connect to “Local server” if the Vivado Hardware server is running in the local machine (most common usage) otherwise, select “Remote server” and click “Next”.
Step 6:
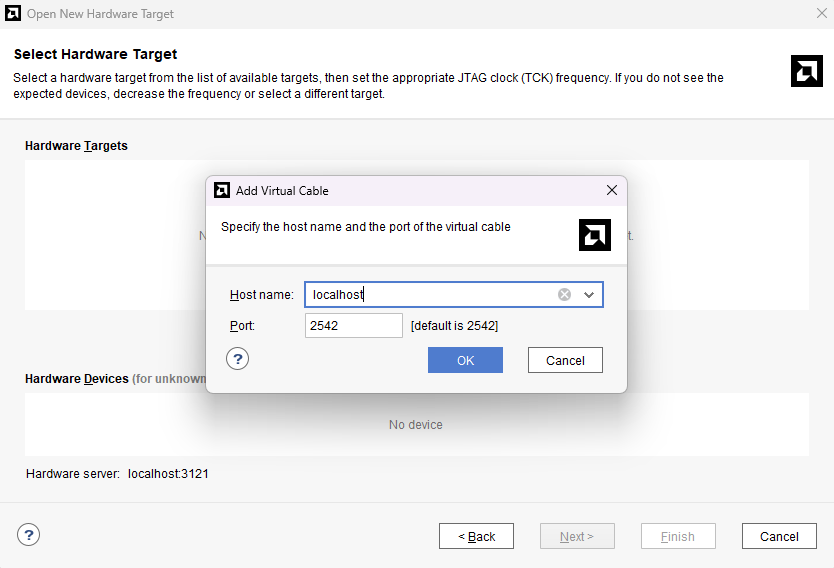
In the next wizard click “Add Xilinx Virtual Cable (XVC)” and enter the Host Address of the system/machine in which target is connected, leave the Port Number as 2542 and click “OK”.
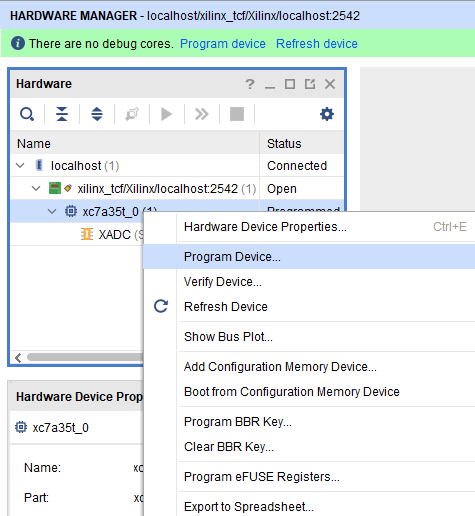
If the target is added successfully, we can observe “xc7a35t_0” available as a Hardware Device in the JTAG Chain.
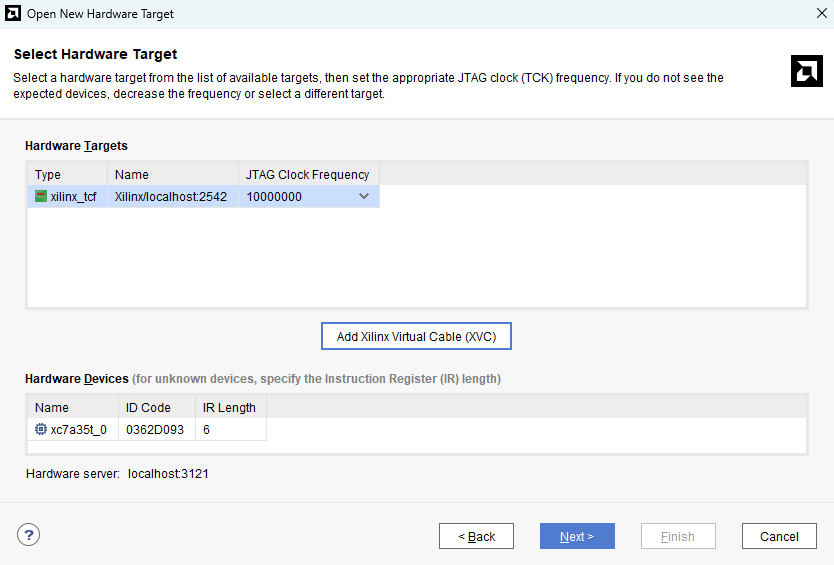
Click “Next” and we can observe the “Hardware Target Summary” wizard.
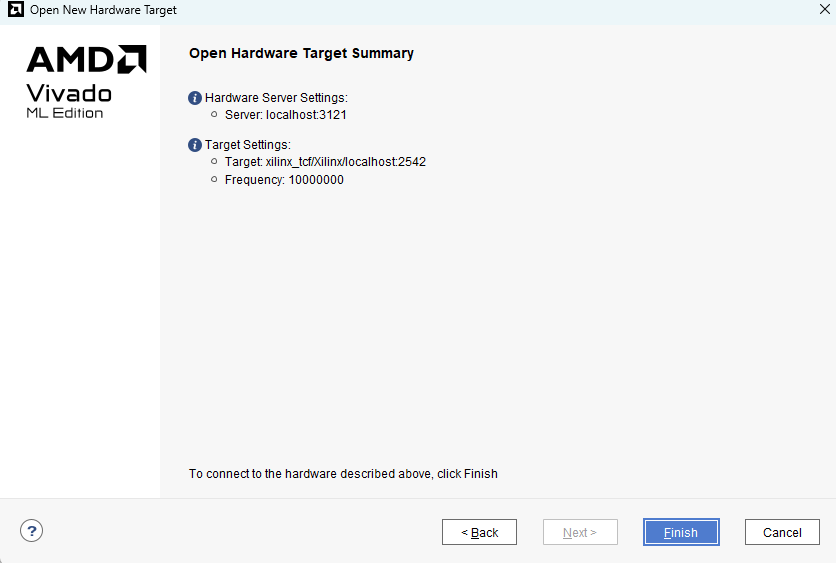
Click “Finish” to connect to the target, which allows us to observe the Mimas A7 Mini device in the Hardware section as shown in the image below.

Step 7:
Right click “xc7a35t_0” device and select “Program Device”.
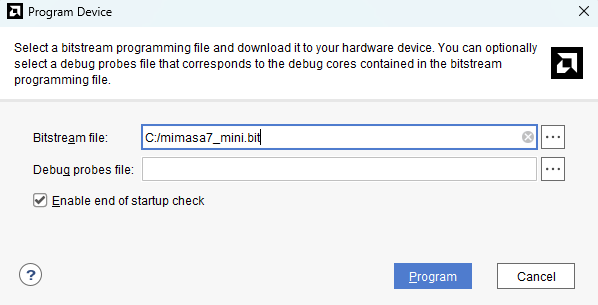
Browse to the MimasA7 Mini bitstream file which you wish to program to the board and click “Program”.
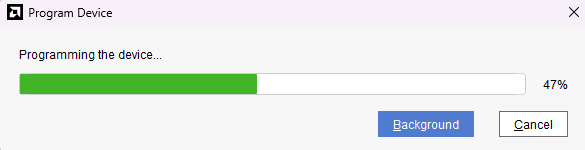
And that’s it, you’ve successfully programmed your bitstream to the Mimas A7 Mini module through the XVC Server using Tenagra, without the need of any external JTAG hardware.