Introduction
The Zephyr RTOS is a secure and scalable Real-Time Operating System from the Linux Foundation for IoT embedded devices. It supports multiple architectures such as ARM, Intel x86, NIOS II, RISC-V, etc. The Zephyr RTOS is modular and useful for low-powered, small memory footprint devices and can easily run on FPGAs as well since FPGAs are well known for their flexibility and versatility. Zephyr comes with in-built support for LiteX built SoCs with VexRiscv CPU. The workflow is highly automated with the help of the LiteX Build Environment project from TimVideos which can build the LiteX SoC gateware with Vexriscv CPU, load it on to the FPGA as well as build the Zephyr firmware using just a few commands. This article will walk you through the steps to build Zephyr RTOS firmware and run the firmware on the Narvi Spartan 7 FPGA Module using LiteX Build Environment.
Prerequisites
- Narvi Spartan 7 FPGA Module
- Linux system (Ubuntu) with Xilinx Vivado ( >= 2018.2) toolchain installed
- USB Type-A to Micro-B cable
- DC power supply (recommended, +7V to +12V)
Let’s get started
The following steps should be run in a Linux host system. Open a Linux shell and run the commands mentioned in the following steps.
Step 1: Download LiteX Build Environment
Install the Narvi Spartan 7 FPGA Module drivers in your Linux system by following the steps mentioned in Narvi User Manual.
Download TimVideos LiteX Build Environment from here to a convenient location in the Linux system. In the terminal, change directory to the litex-buildenv repository by executing (For example, if it is downloaded in the home directory) the command:
cd litex-buildenv
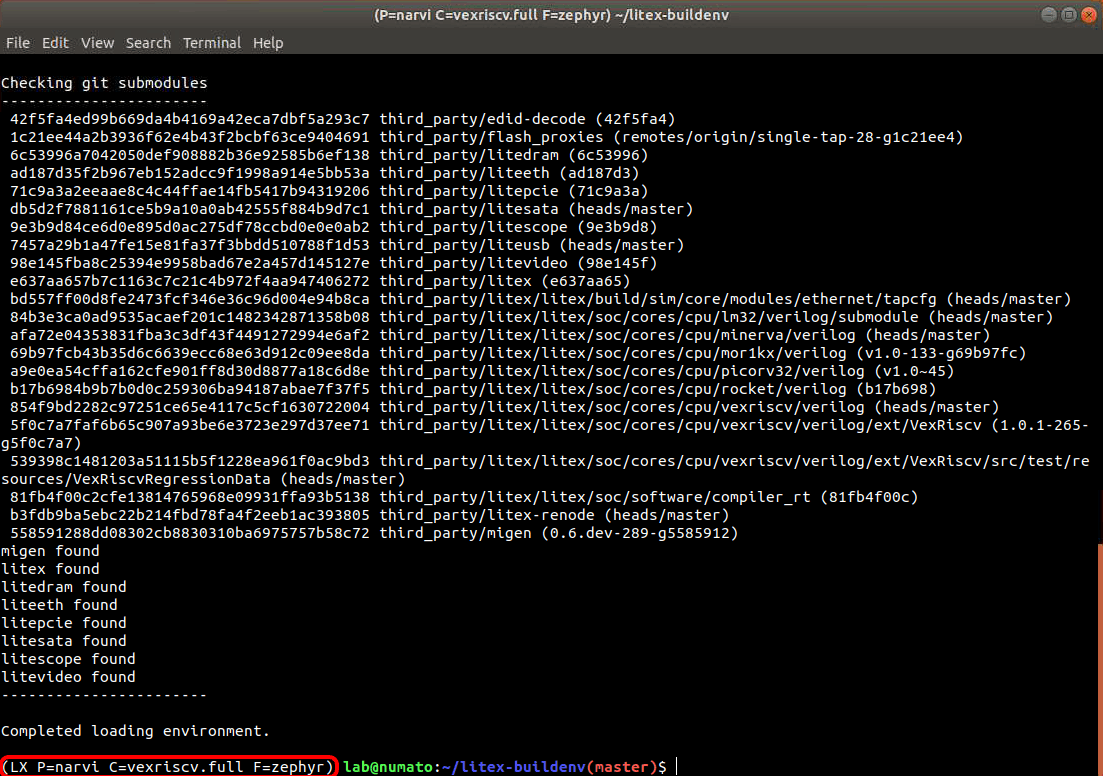
Run “download-env.sh” script file inside “scripts” directory which will download the dependency packages required by the “litex-buildenv“ such as cross-compilers for RISC-V, programming tools (OpenOCD), etc.
./scripts/download-env.sh
We will use OpenOCD to program Narvi Spartan 7 FPGA Module.Download the OpenOCD configuration file for Narvi i.e, “numato_narvi.cfg” from here and save it inside litex-buildenv/build/conda/share/openocd/scripts/board/ directory.
Step 2: Enter the Environment
Before running any of the build steps, the first step required is to enter the litex-buildenv environment.
Set up the environment variables that decide the FPGA board platform being used, CPU variant, target SoC configuration and the firmware using the following command.
export PLATFORM=narvi CPU=vexriscv CPU_VARIANT=full TARGET=base FIRMWARE=zephyr
The Litex Build Environment available from our repo comes with Narvi platform support. We are going to deploy LiteX SoC with the VexRiscv CPU on Narvi, so choose CPU as “vexriscv” and CPU variant as “full” to enable all features of the CPU. The litex-buildenv supports many different firmware options such as bare-metal, Linux, MicroPython, Zephyr, etc. For this article, we select FIRMWARE=zephyr.
Run the following command to enter the litex-buildenv environment with the previously set variables:
source scripts/enter-env.sh
If the environment was set up correctly, the terminal should now show something like this:
(LX P=narvi C=vexriscv.full F=zephyr)#
Step 3: Build the Gateware
After entering the litex-buildenv environment, we can now build the gateware for the Narvi board. To start the gateware build process, run:
make gateware
Building the gateware usually takes a couple of few minutes, depending on the host system’s performance. An output similar to the one shown in the image below means the gateware was successfully built and the bitstream (top.[bit|bin]) generated.
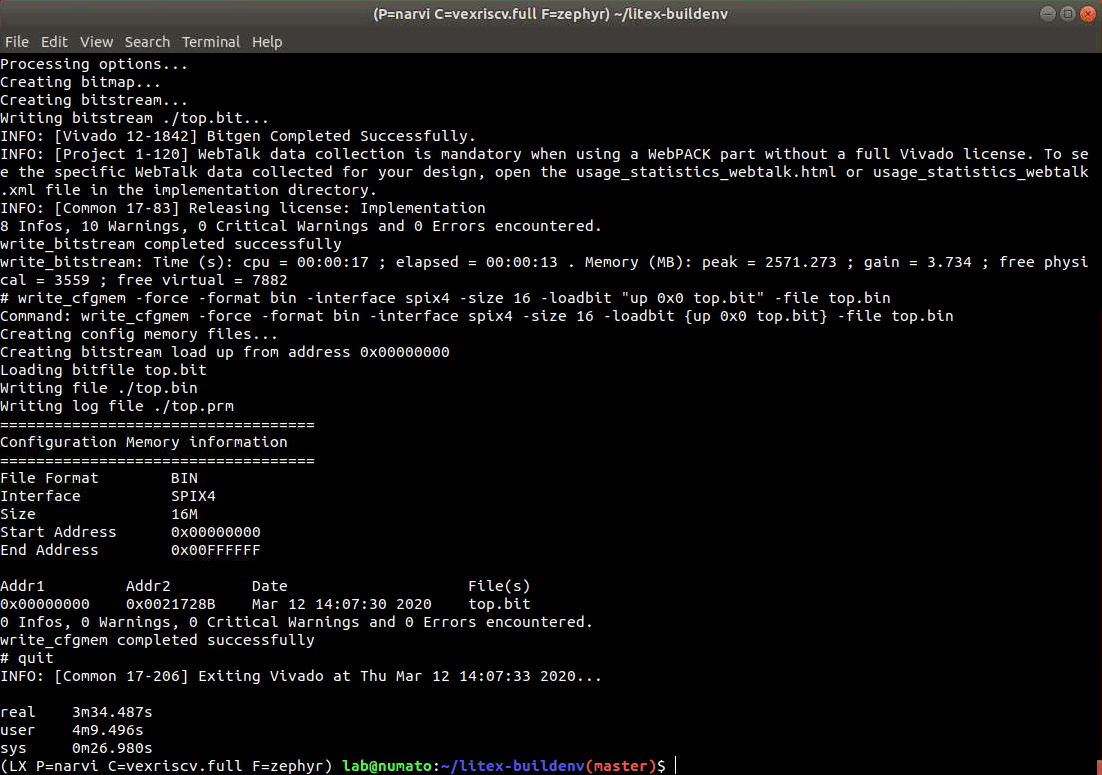
The generated bitstream and related gateware files can be found in the directory: build/narvi_base_vexriscv.full/gateware/
Step 4: Build Zephyr RTOS
We need to compile Zephyr RTOS firmware to load it on the soft CPU. The LiteX Build Environment has a Zephyr script file that sets up Zephyr and compiles this Zephyr firmware. To build the Zephyr firmware, run:
./scripts/build-zephyr.sh
By default, this command builds the Zephyr shell application, similar to a Linux shell. The compiled firmware can be found in the directory: build/narvi_base_vexriscv.full/software/zephyr. It is also possible to build other applications of your choice by setting the ZEPHYR_APP environment variable.
Note: Always clean the build directory before building another zephyr application firmware. The command to be used to clean the build directory is given below.
rm -rf build/narvi_base_vexriscv.full/software/zephyr
We can generate an example application firmware which prints “Hello World!” by running the following command:
ZEPHYR_APP=hello_world ./scripts/build-zephyr.sh
Step 5: Loading the Gateware and Zephyr RTOS onto the Narvi
Once the gateware and firmware have been generated, the next step is to load the generated gateware and firmware to the Narvi Spartan 7 FPGA Module. Power up Narvi using an external DC power supply and connect it to the Linux system through a USB Type-A to Micro-B cable. Open a new terminal window (keeping the existing terminal shell as it is, it will be used later) and enter into the litex-buildenv environment exactly as described in Step 2. Next, enter the following command in this new terminal to load the Zephyr firmware:
make firmware-load
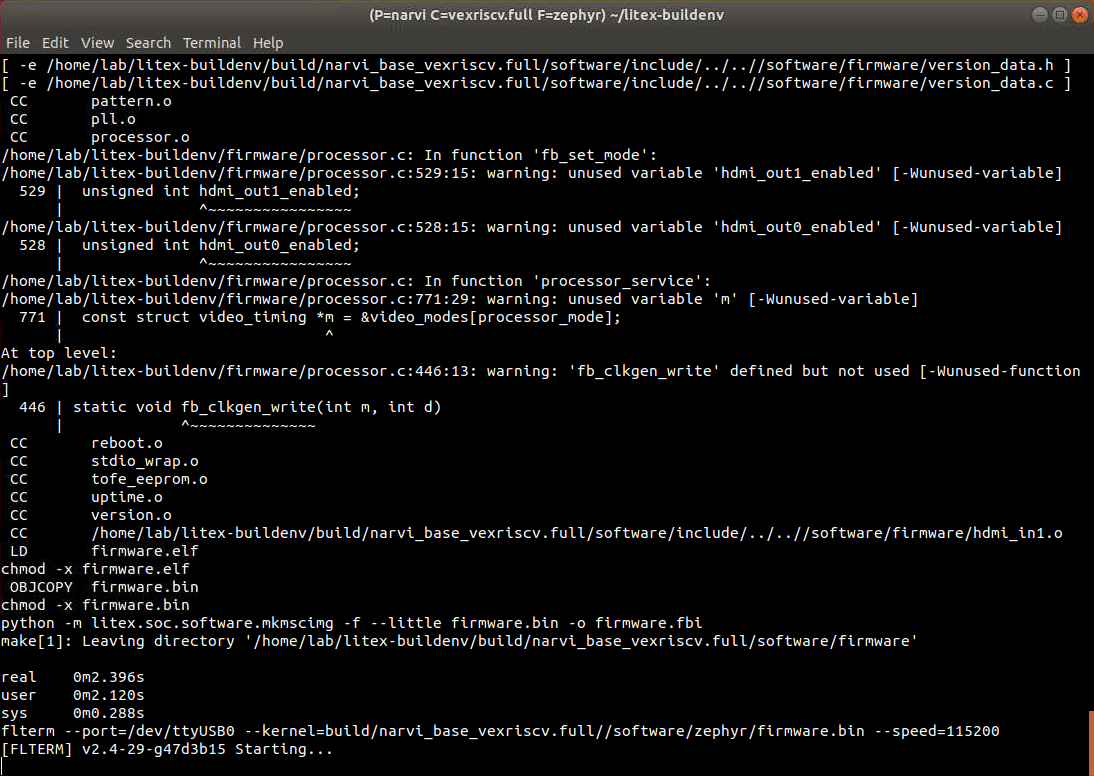
You will see the flterm tool output “Starting”, and it connects to Narvi using /dev/ttyUSB. The next step is to load the gateware onto the Narvi board. Going back to the previous terminal, run the following command to load the gateware:
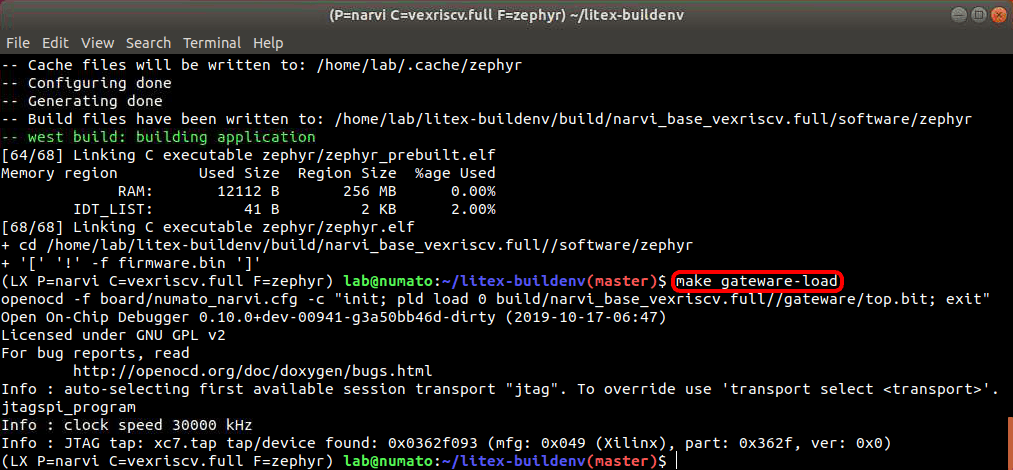
make gateware-load
The Done LED on the Narvi board should glow on for a moment and then go off after running the above command. This indicates that the gateware was successfully loaded to the FPGA on-board Narvi.
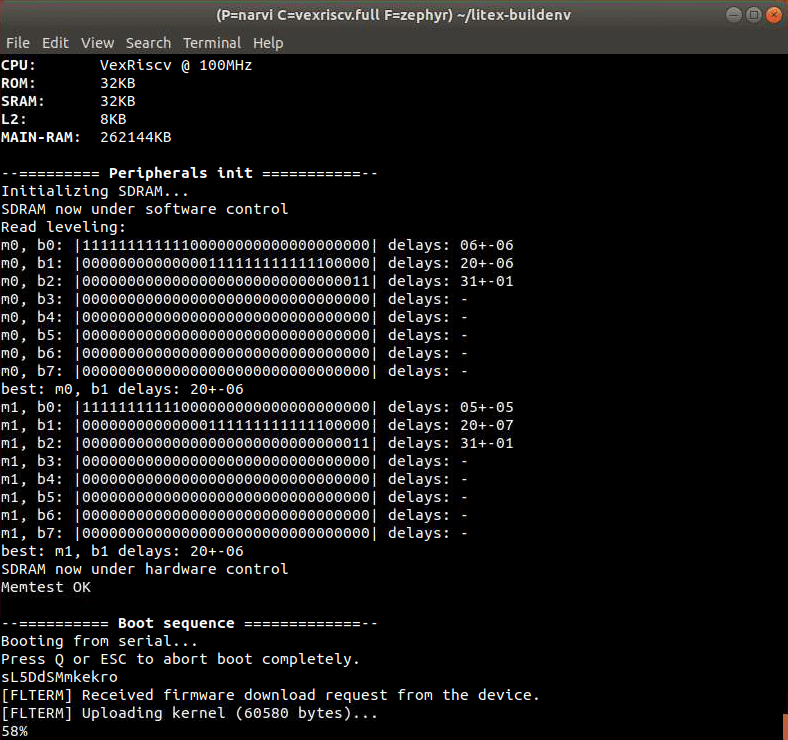
After loading the gateware into the FPGA on Narvi, the second terminal should start uploading the Zephyr RTOS firmware to the Vexriscv soft CPU running on the Narvi. The image below shows the RTOS Zephyr firmware loading on to soft CPU.
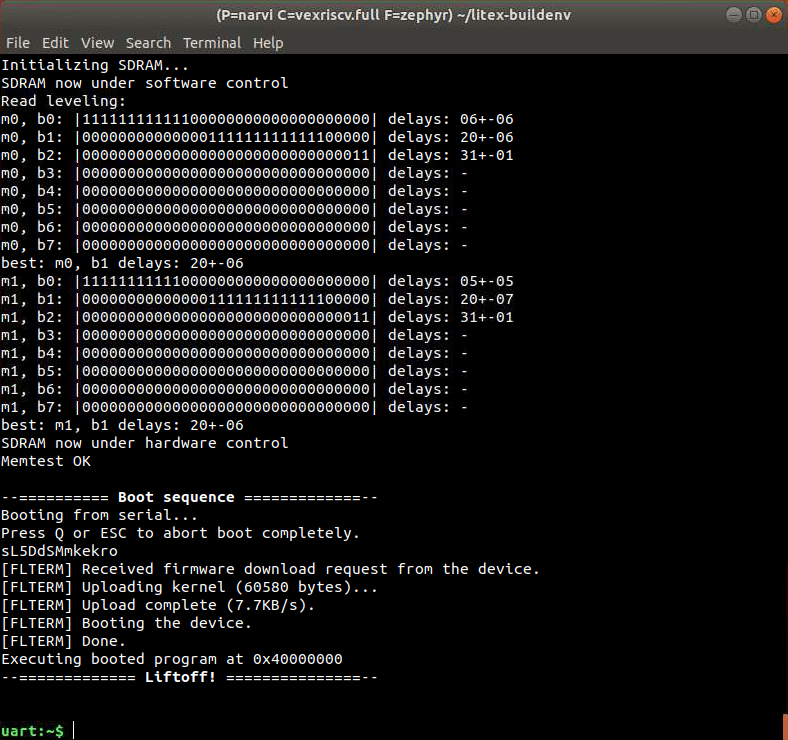
Once the firmware upload is completed, the Zephyr RTOS should start running. The output will correspond to the Zephyr application for which the firmware has been compiled and generated.
If the firmware was built with the Zephyr Shell application, the output would be similar to the image below:
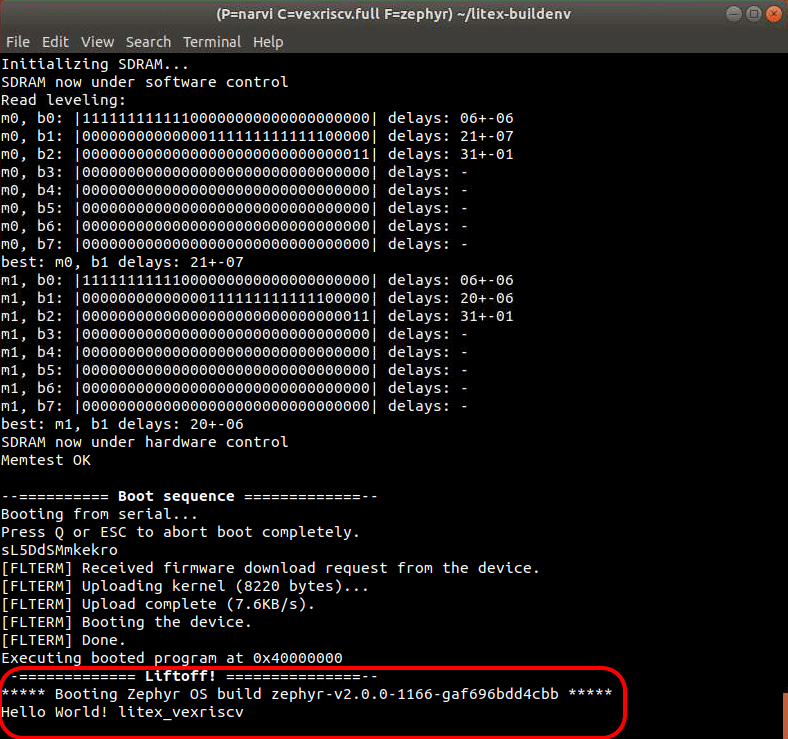
If the firmware was built with the Zephyr Hello World application, the output would be similar to the image below:
Congratulations on getting the Zephyr OS running successfully on the Vexriscv RISC-V CPU built with LiteX on your Narvi Spartan 7 FPGA Module.