Introduction
MicroPython is an implementation of Python 3 that can be executed on embedded development boards. We can run MicroPython firmware on FPGAs which are loaded with gateware that contains a soft CPU. Gateware refers to the FPGA configuration containing the hardware design. MicroPython thus simplifies the job of FPGA designers by letting them create complex designs in Python, rather than relying on low-level languages like C or C++. This article will help you get started with running FPGA MicroPython on Mimas A7 Mini FPGA Development board that features an Artix 7 FPGA. The TimVideos projects have LiteX Build Environment for building LiteX and Migen based FPGA designs. We will use LiteX Build Environment to get MicroPython running on Mimas A7 Mini. As you follow this article, you will:
- Create hardware bitstream that contains a soft CPU
- Build MicroPython firmware that runs on the soft CPU
- Load these on Mimas A7 Mini and obtain a prompt of the MicroPython shell
- Execute Python code!
Prerequisites
- Mimas A7 Mini FPGA Development board
- Linux system (Ubuntu) with Xilinx Vivado toolchain installed
- USB Micro cable for programming Mimas A7 Mini board
Let’s get started
The following steps are to be executed in Linux. Open Linux Terminal and follow the steps given below.
Step 1: Download LiteX Build Environment
Download the TimVideos LiteX Build Environment from here to a suitable location in your system. Then in the terminal, change directory to the litex-buildenv repository. The author has downloaded litex-buildenv into the Home directory. So, the command is as shown below.
cd litex-buildenv
To install the dependency packages required for the build environment, run the “download-env.sh” script file.
./scripts/download-env.sh
We will use OpenOCD to program the Mimas A7 Mini board. So download numato_mimas_a7_mini.cfg from here and save it inside litex-buildenv/build/conda/share/openocd/scripts/board/ directory.
Step 2: Enter the environment
Before running any of the build steps, you must enter the development environment. This step should be done whenever you select a new terminal window.
First set up the build targets by running the following command.
export PLATFORM=mimas_a7_mini CPU=lm32 TARGET=base FIRMWARE=micropythonThe litex-buildenv repository that we have downloaded has Mimas A7 Mini platform support, so we can directly set Mimas A7 Mini as the platform. Even if we have not set the soft CPU and target, lm32 and base will be the soft CPU and target respectively, by default. We can also use other soft CPUs supported by the LiteX Build Environment.
To set up the environment for the above build targets, run the following command:
source scripts/enter-env.sh
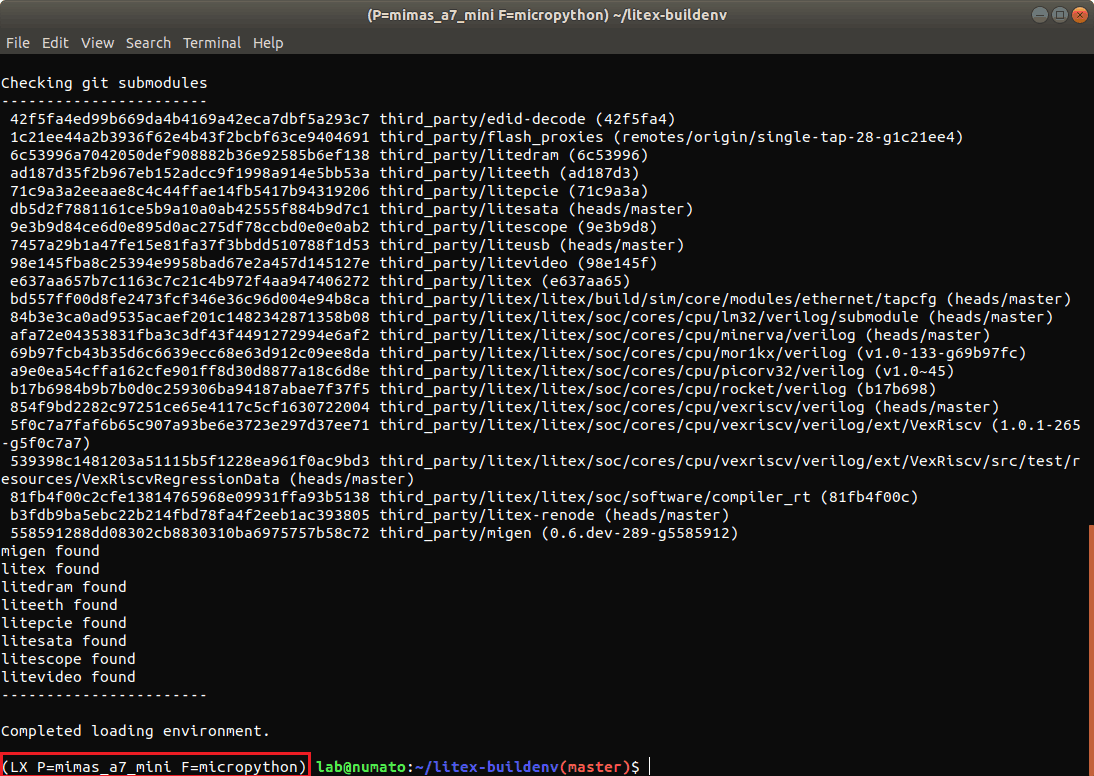
If your environment is set up correctly, your terminal should show something like this:
LX P=mimas_a7_mini F=micropython #
Step 3: Build the gateware
Once you have entered the environment, you can build the gateware for the build targets. To build gateware, run:
make gateware
Building this gateware might take a few minutes. If this command runs successfully, in the end, your terminal window should look similar to the image shown below.
You can get built gateware at build/mimas_a7_mini_micropython_lm32/gateware/ location.
Step 4: Building MicroPython
We need to generate MicroPython firmware and load it on the soft CPU. The LiteX Build Environment has a MicroPython script file that generates MicroPython firmware. To generate MicroPython firmware, run:
./scripts/build-micropython.sh
Step 5: Loading Gateware and MicroPython Firmware onto Mimas A7 Mini
Connect one end of Micro USB cable to your laptop/PC and the other end to Mimas A7 Mini board. Before loading the firmware, in the terminal go to File -> New Window. In the new window, enter the development environment as described in step 2 and run the following command to load the MicroPython firmware.
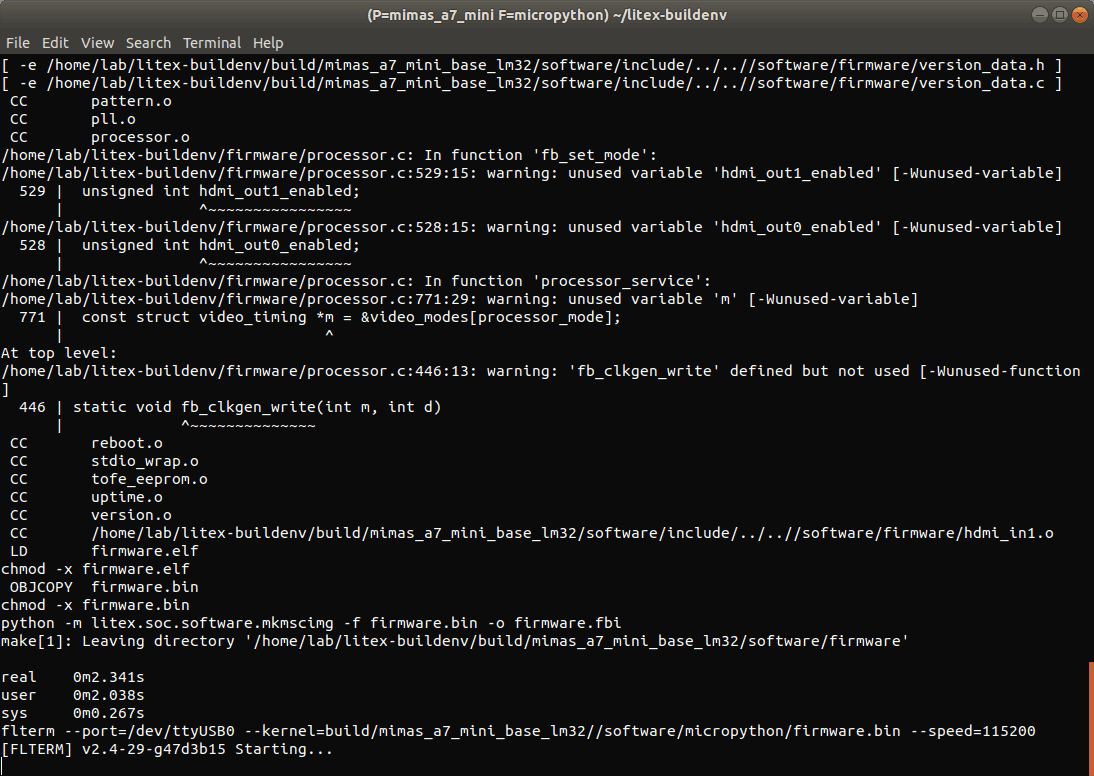
make firmware-load
You will see flterm tool “Starting” that connects to Mimas A7 Mini using /dev/ttyUSB.
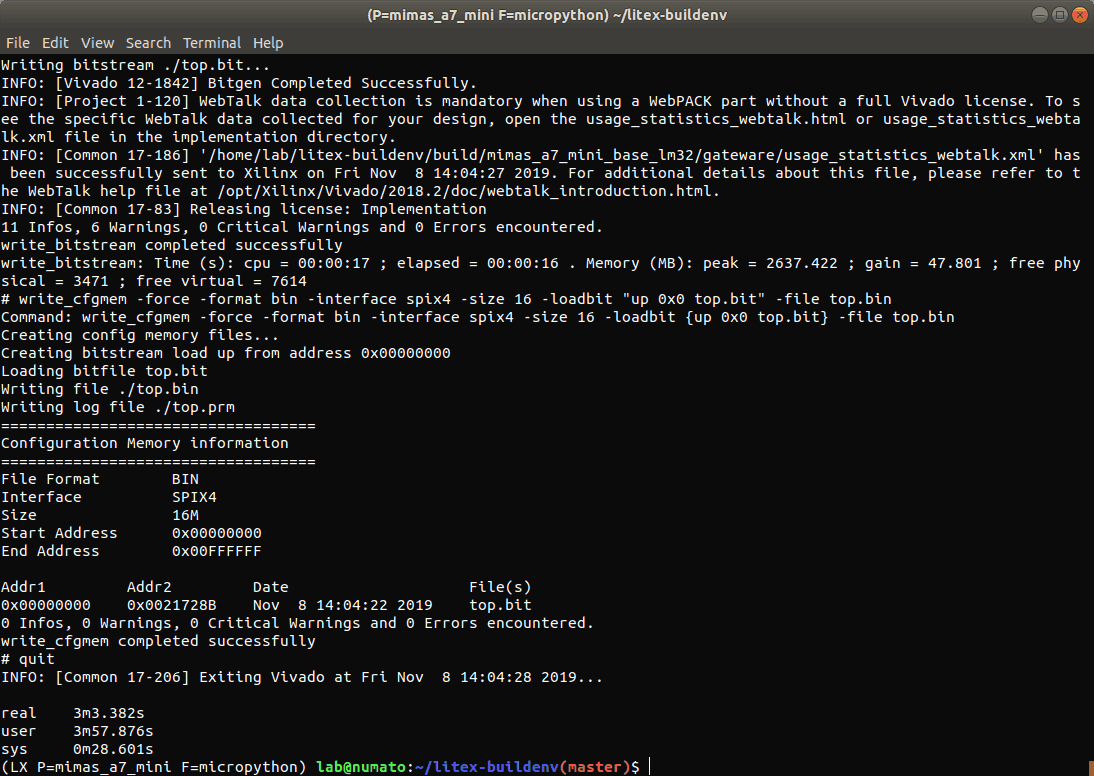
Now you can load the gateware onto Mimas A7 Mini by running the following command (in the older terminal window):
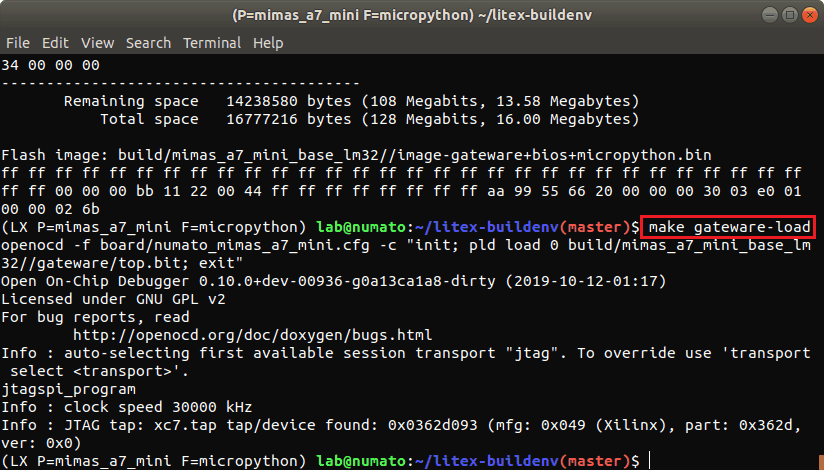
make gateware-load
The Done LED on Mimas A7 Mini board should glow when you run this command. It indicates that the gateware is loading onto Mimas A7 Mini.
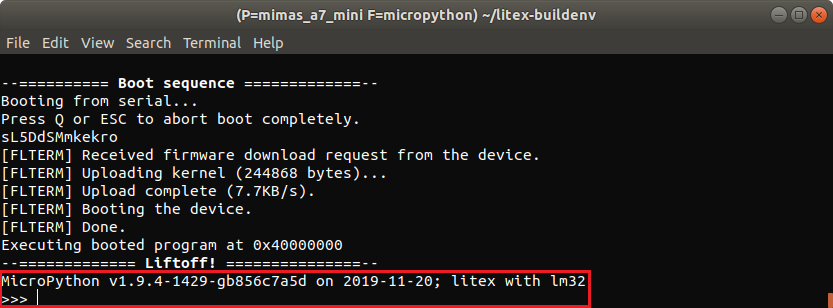
Once the gateware is loaded, the MicroPython firmware starts loading onto the soft CPU which is implemented on the FPGA. The image below shows MicroPython firmware loading onto the soft CPU.

Once the firmware is loaded, MicroPython should boot, and then you should get a prompt of the MicroPython shell as shown in the image below.
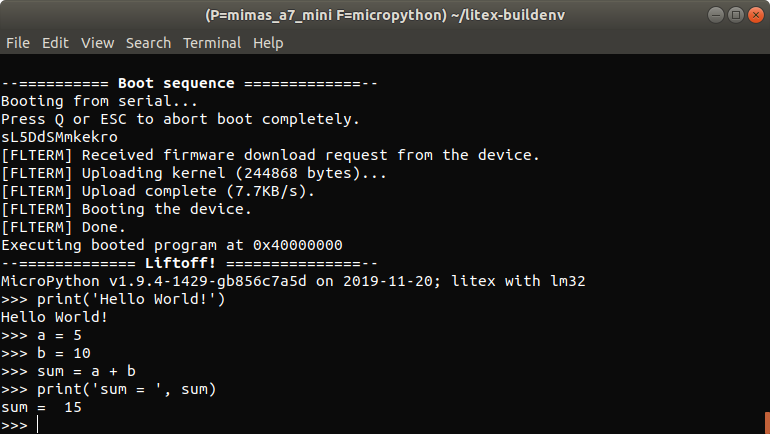
You can use this MicroPython console to execute Python code as shown in the image below. As in the examples shown in the image, you can print any text, add numbers and also control Mimas A7 Mini board by implementing the design in Python.
Congratulations! You have MicroPython running successfully on Mimas A7 Mini!