Introduction
Vivado Design Suite by Xilinx is used for synthesis and analysis of HDL designs with additional features for SoC development and high-level synthesis. Xilinx recommends use of Vivado Design Suite for new designs with Ultra scale, Virtex-7, Kintex-7, Artix-7, and Zynq-7000. In this article we will use Vivado to create a basic “Hello World” program for Styx Zynq Module running on Zynq’s ARM processor. We will also demonstrate use of EMIO for routing peripheral signals to programmable logic.
Styx Zynq Module
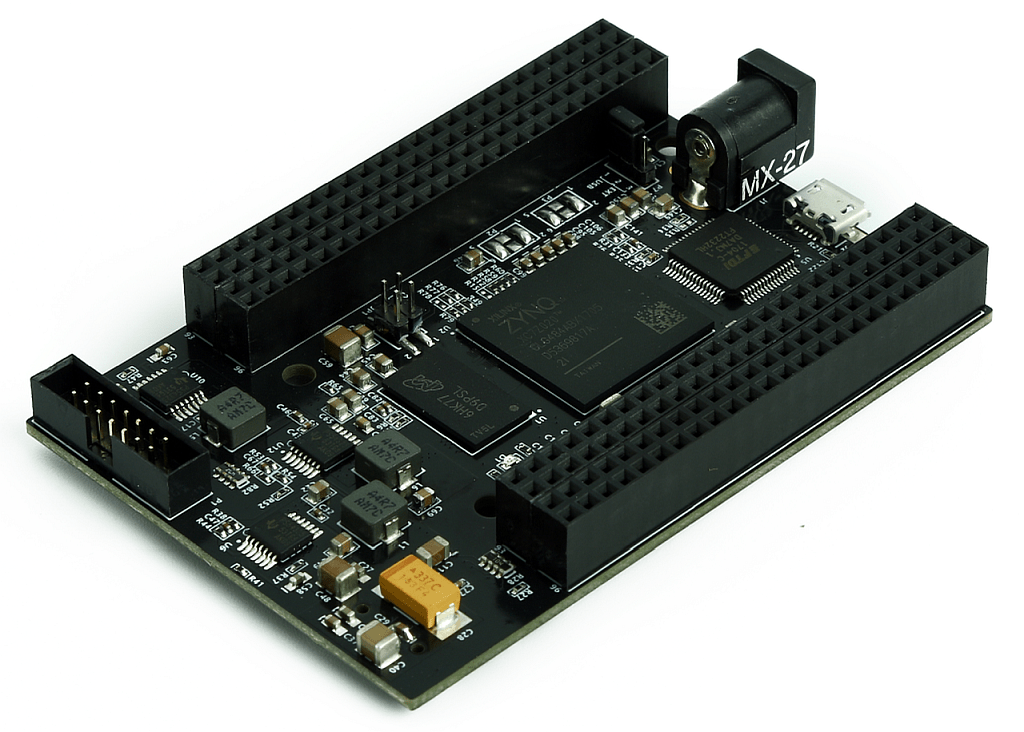
Styx Zynq Module is the first product from Numato Lab featuring Zynq-70xx SoC. Styx is pin-compatible with Numato Lab’s Saturn Spartan 6 FPGA module, Neso Artix 7 FPGA module and Skoll Kintex 7 FPGA module and allows for seamless upgrade in most cases. Styx offers built in USB 2.0 interface that can be used to program the board as well as do debugging or data transfer with the host.
Styx Zynq Module features a Zynq 7020 from Xilinx in CLG484 package. The unique feature of Zynq-7000 series is that they are complete System on Chip (SoC) with an FPGA die which makes it a very powerful combination. Zynq 7020 has dual-core ARM Cortex A9 and a whole bunch of peripherals which are typically found in SoCs. Additionally, it has Artix-7 equivalent programmable logic section, connected to SoC using AXI interconnects. This SoC + FPGA combination makes Zynq very flexible for multitude of uses. With Zynq 7020 on board, Styx is a great choice for learning, product development and OEM integration.
Prerequisites
To follow this article, you would need the following:
- Hardware:
- Styx Zynq Module
- Xilinx Platform Cable II JTAG debugger.
- Software:
- Xilinx Vivado Design Suite 2023.2
- Vitis Classic 2023.2
- FT_Prog tool for configuring on-board FT2232H USB Serial converter (download and install from FTDI website)
Let’s get started
The following steps will walk you through the process of creating a new project with Vivado and building a hardware platform with Zynq processing system using IP integrator. This article is written for Numato Lab’s Styx Zynq Module, but can be adapted to any other Zynq based platform with minor changes. Screenshots are added wherever possible to make the process easier to the reader.
Step 1:
Download and install Vivado Board Support Package files for Styx from here. Follow the readme in the link on how to install Vivado Board Support Package files for Numato Lab’s boards.
Step 2:
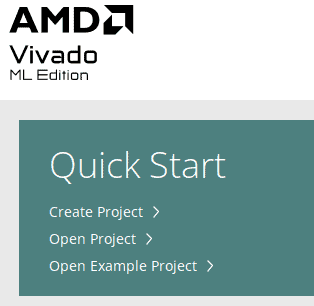
Start Vivado Design Suite, and select “Create New Project” from Quick Start section. The project wizard will pop up. Press next to proceed with creating the project.
Step 3:
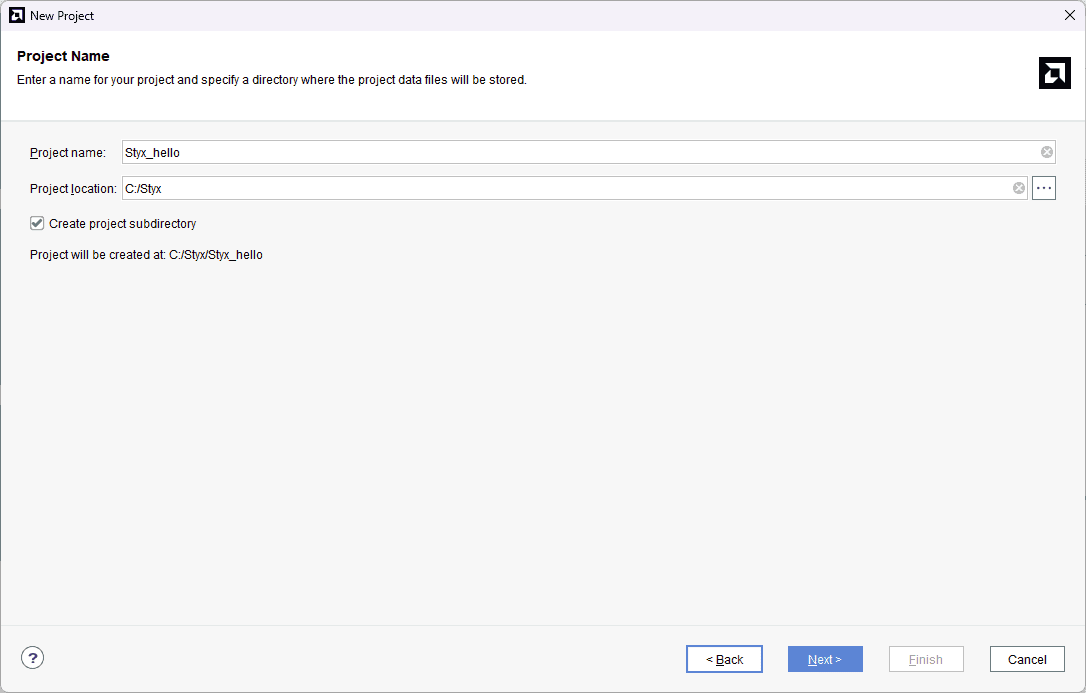
Type in a project name and save it at a convenient location. For this example “Styx_hello” is used as project name, but feel free to use any name. Select the check box below to keep all project files in a single folder. The image below shows the settings for the example project. Click “Next” to continue.
Step 4:
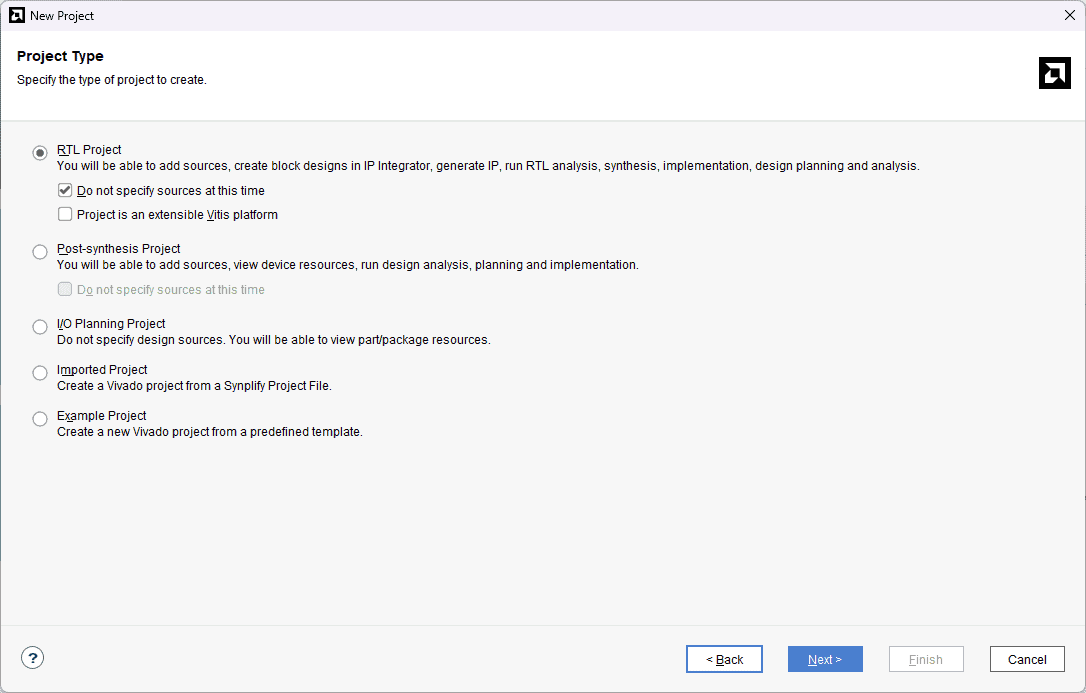
Choose “RTL Project” as project type and check the option “Do not specify sources at this time”.
Step 5:
At the “Default Part” step, select “Boards” and choose Vendor as “numato.com”. Select “Styx” and click “Next”. If Styx is not displayed in the boards list, you will need to install Styx board support files correctly.
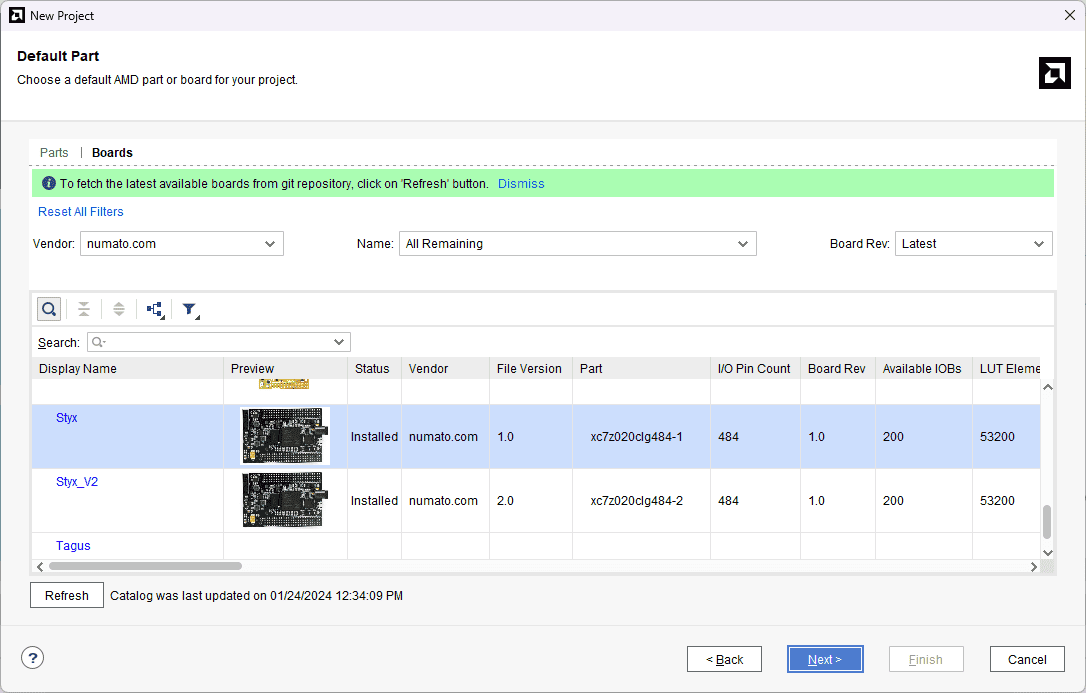
Continue the wizard and finish creating the project. When the new project wizard exits, a new project will be opened up in Vivado with the settings you have selected.
Step 6:
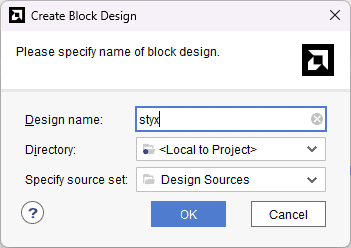
Under Flow Navigator, select “Create Block Design” in IP Integrator. Give an appropriate name to design. We will call it “styx” for example.
Step 7:
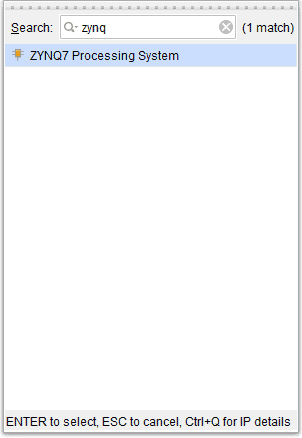
Go to Diagram window, right click and select “Add IP” from the popup menu. Search for ZYNQ7 Processing System. Add it to block design by double clicking.
Step 8:
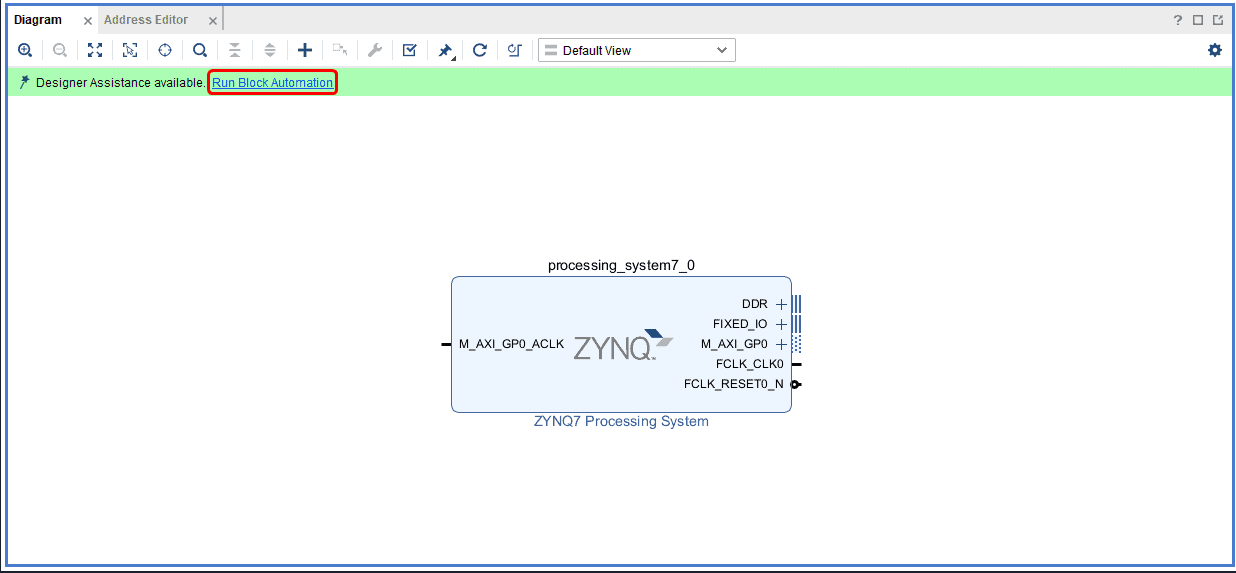
Click on “Run Block Automation” option on the green bar.
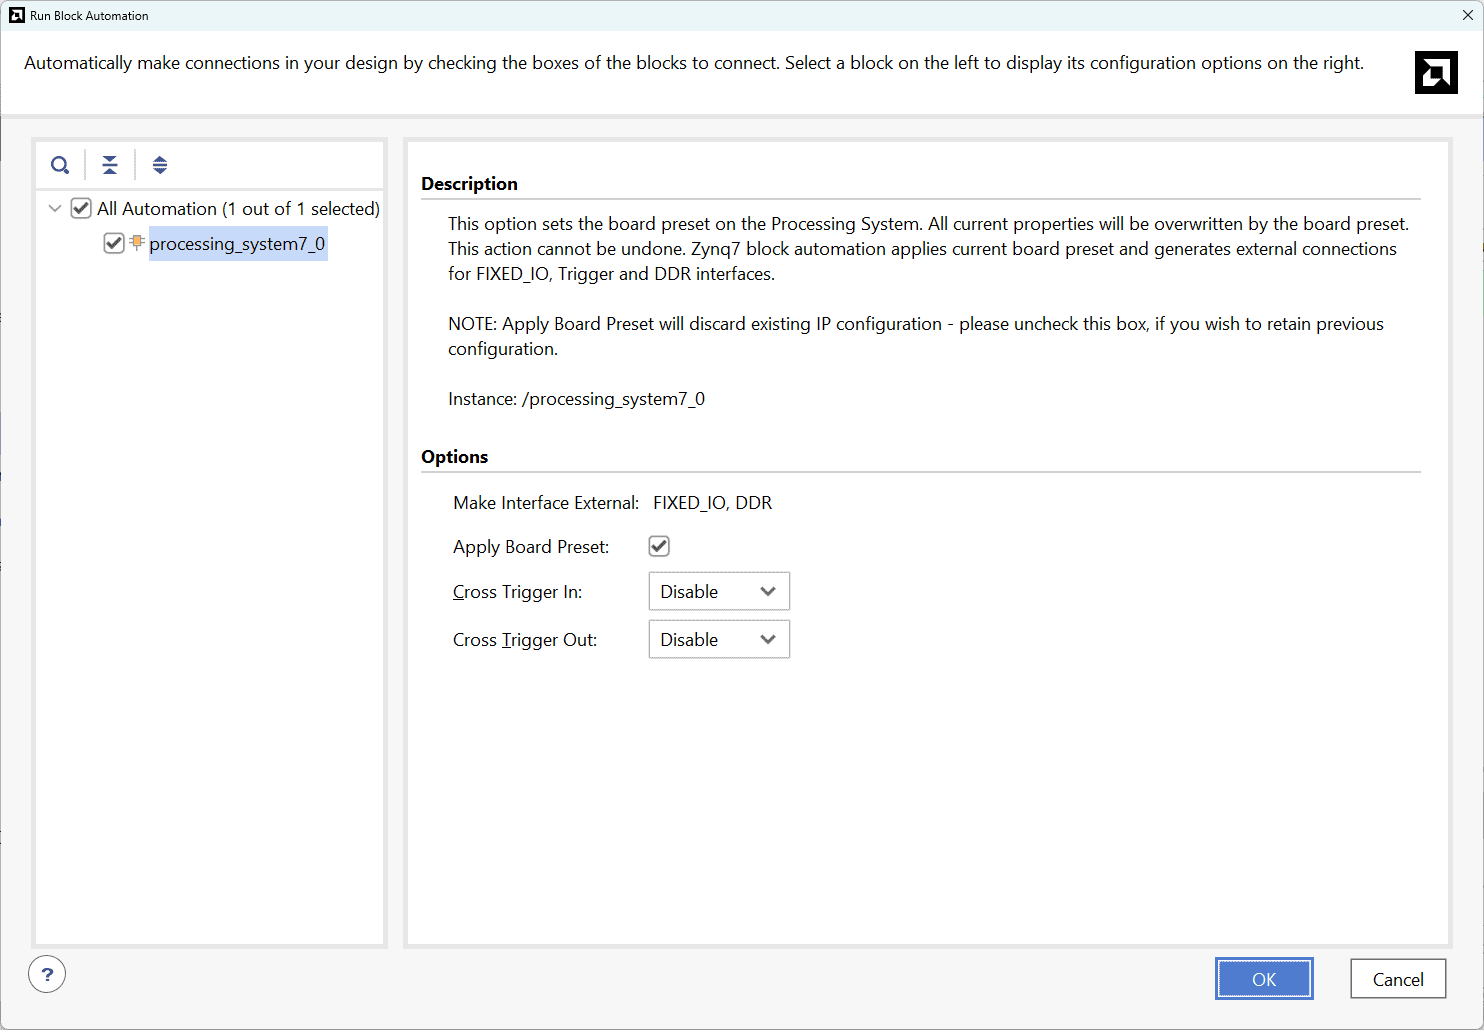
Step 9:
In the “Run Block Automation” window, select the options as in image below and click OK.
Step 10:
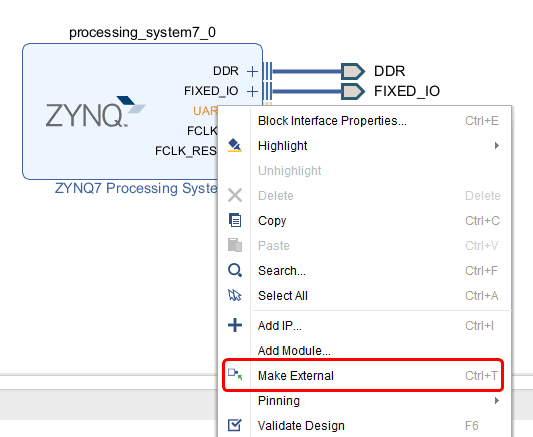
The Zynq IP block will have changed after running block automation. Right click on “UART_0” port of the Zynq IP block and select “Make External”.
Step 11:
Now we have to add constraints for the external UART_0 port. In the Sources window, right-click anywhere and select “Edit Constraints Sets”. Add a new constraints file, paste the code below and save the file with a convenient name.
set_property -dict {PACKAGE_PIN T22 IOSTANDARD LVCMOS33} [get_ports UART_0_0_rxd]
set_property -dict {PACKAGE_PIN T21 IOSTANDARD LVCMOS33} [get_ports UART_0_0_txd]
Step 12:
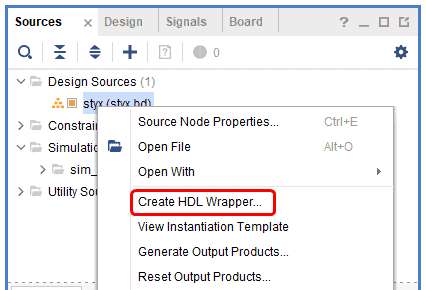
Go to “Sources” tab, right click on “styx” design file and select “Create HDL Wrapper”. Click OK on the window that appears to finish generating wrapper.
Step 13:
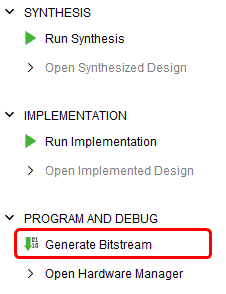
Click “Generate Bitstream” under PROGRAM AND DEBUG section and click “Yes” in any subsequent dialog window which comes up.
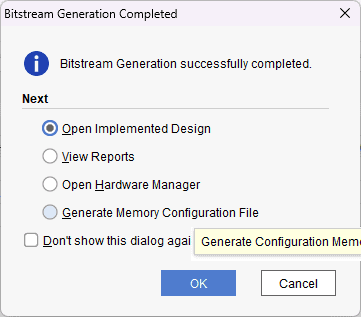
Step 14:
Once the bitstream is successfully generated, close any “Bitstream Generation Completed” dialog which comes up asking for what to do next.
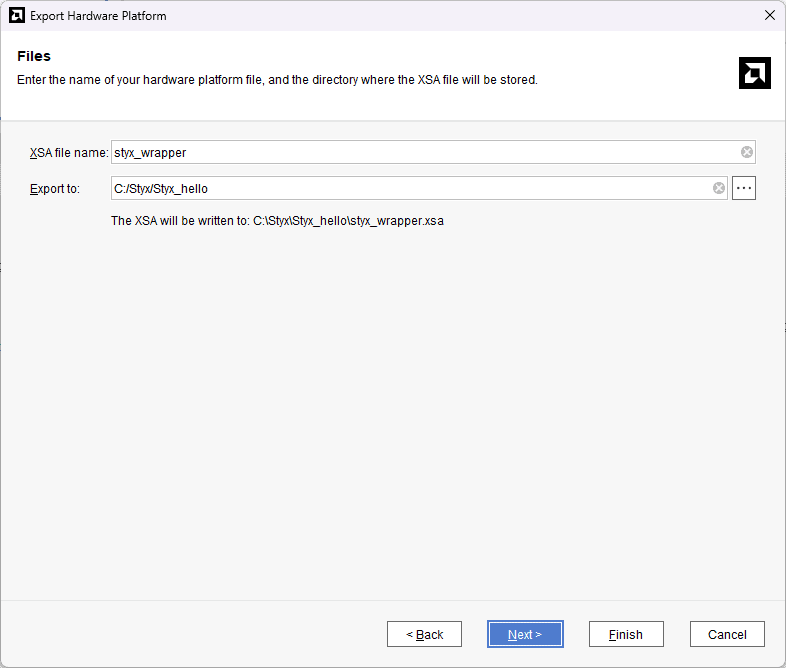
Go to File -> Export -> Export Hardware…
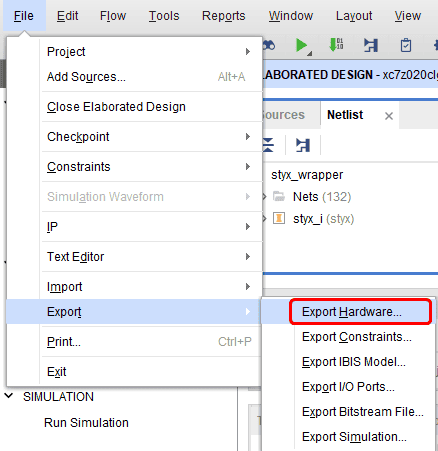
Check “Include bitstream”, keep “Export to:” default, and click OK.
Step 15:
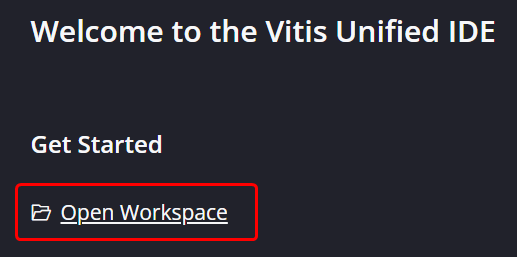
Finally open Vitis unified IDE by following the steps Tools–> Launch Vitis IDE .

Step 16:
After Vitis windows opens, click on “Open Workspace” and select necessary folder to keep the Vitis files.
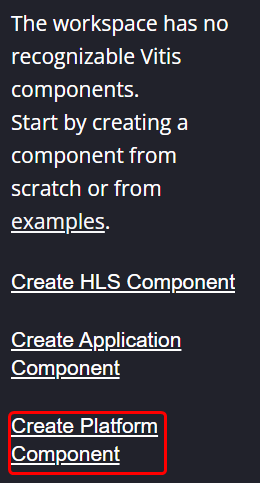
Step 17:
Create a new platform for the project, by selecting “Create Platform Component”, click “Next”, in the Flow tab select the XSA file saved using the step 14 and finally click “Next” and “Finish” respectively.

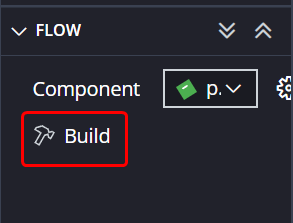
After successful creation of the platform, build the platform.
Step 17:
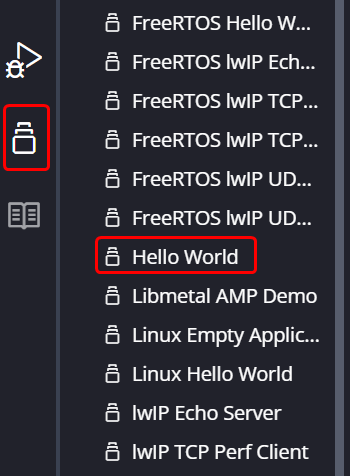
Next create the Helloworld Application component by selecting the “Helloworld” template from the “examples”, select “Create Application Component from Template”, specify project name and location, click “Next”, select newly created platform, click “Next” and then finally “Finish”.
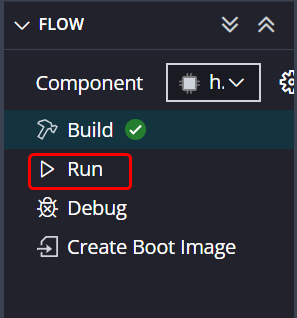
When the Helloworld project is added successfully, build the project manually.
Step 17:
Once the build is complete successfully, power up Styx Zynq Module and connect Xilinx Platform USB cable and Micro USB cable for Serial debugging to the board. Make sure to configure channel A of the onboard FT2232H USB – Serial device as virtual communication using FT_Prog. The process is very similar to that of Saturn and details are available here. Change the Styx’s Boot Mode to JTAG. Please refer to user manual to learn more about configuring Styx’s Boot Mode.
Step 18:
Meanwhile, open any serial terminal program (such as PuTTY, Teraterm etc) and open the port corresponding to Styx’s Channel A at 115200 baudrate. Program the board by selecting the “Run”.
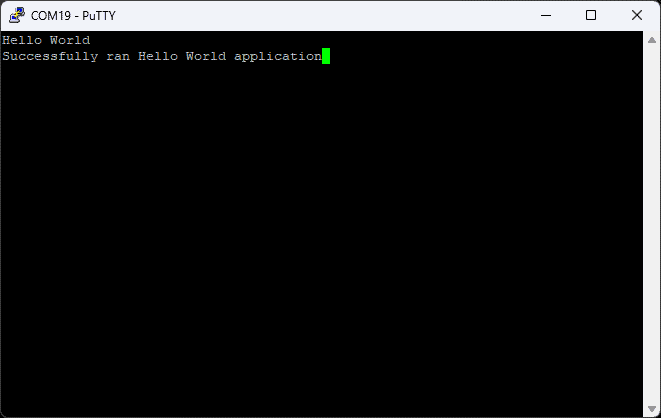
Step 20:
If everything went well, the application running on the board should print “Hello World” over the UART and should be displayed on the Serial Terminal application.
Sadly this did not work for me and I followed the instructions explicitly. Vivado does not see that there is a board connected to the Xilinx Platform USB II cable even though I can program my Zedboard using the same debugger I know the debugger works. I triple checked the jumper settings but cannot get it to work. See error message below. Programming by flash utility and SD card both work fine.
Could not find FPGA device on the board for connection ‘Local’.
October 12, 2018 at 12:48 amTroubleshooting hints:
1. Check whether board is connected to system properly.
1. In case of zynq board, check whether Digilent/Xilinx cable switch settings are correct.
1. If you are using Xilinx Platform Cable USB, ensure that status LED is green.
Update: All is working now on my board. I was incorrectly reading the jumper pins on the silk screen print. Numato has excellent customer support.
October 12, 2018 at 9:54 amI’m using VIVADO 2018 on windows 10 for configuring the Styx board. I’m using Digilent HS2 JTAG cable and microUSB cable for programming and accessing serial port of the board. The problem with windows 10 is that serial driver (setup.exe) mentioned in the article is not installing correctly so as to see the desired port in COM#. I have tried updating drivers using auto update from internet but it couldn’t find the drivers this way. Somehow I forced the device manager to use installed FTDI usb controller to the unidentified devices. it worked somewhat but not fine. I’m not getting hello world on serial screen but some garbage data even after trying many baud rate of the serial terminal. FYI, I changes the jumper from 1-3, 2-4 position to 1-2 only for JTAG boot mode. I’m able to burn the bit file to FPGA and run the hello world program but sometimes it throws the error of DONE pin not set (sometimes it doesn’t).
June 13, 2019 at 5:37 amPlease suggest any alternate driver for accessing on-board serial port.
Or please share your experience with the board programming through windows 10.
or please direct to some other example for the board which uses PL and PS sections (may be setting some IO ON/OFF through serial or anything like this)
Hi, please send a mail to [email protected] with the above text. We will be able to help you much better via the support system. Thanks!
June 21, 2019 at 8:19 amHi, I’m here again. Thanks Rohit for the suggestion, I’ll follow. Numato recently updated the driver set and now the driver has got installed correctly and I don’t need any com port manipulation and everything is like it should be, as fas as driver installation is concerned.
July 30, 2019 at 9:03 amBut another problem arises. Using micro-USB cable along it doesn’t allow me to program the device. However I’m able to get the printed hello world by connceting both cables (micro-USB and Digilent HS2).
It threw the same message (when u-USB alone was used) like what Christopher smith said, though in my case I have correctly connected the jumper (I’m able to program with both cables plugged in with same jumper setting).
Please tell what’s the problem and where might be the mistake.