Introduction
In computer hardware, Direct Memory Access (or DMA) is a feature that allows peripheral devices to access main memory, without burdening the processor. PCIe stands for “Peripheral Component Interconnect Express”, and is a serial expansion bus standard for interconnecting peripheral devices, as the name suggests. In this article, we will see how to implement a simple design to read and write data to Aller AU-Plus FPGA Board which acts as a PCI Express endpoint device. Aller features an M.2 form factor M-key slot which is a computer storage interface based on the PCI Express standard. We will use Xilinx’s DMA for PCI Express (PCIe) Subsystem or XDMA IP core in this example design. We will also demonstrate the PCIe DMA functionality in this article.
Prerequisites:
Hardware:
- Aller AU-Plus FPGA Module
- Aller AU-Plus Carrier
- Xilinx Platform Cable USB
- USB type C cable
- Host PC with Linux or Windows (Linux preferred)
Software:
- Vivado Design Suite (version 2024.1)
Creating PCIe DMA Design in Vivado
Please follow the reference article up to the section titled “Controlling the GPIOs.” This includes completing the Vivado design and confirming device detection with lspci in Linux.
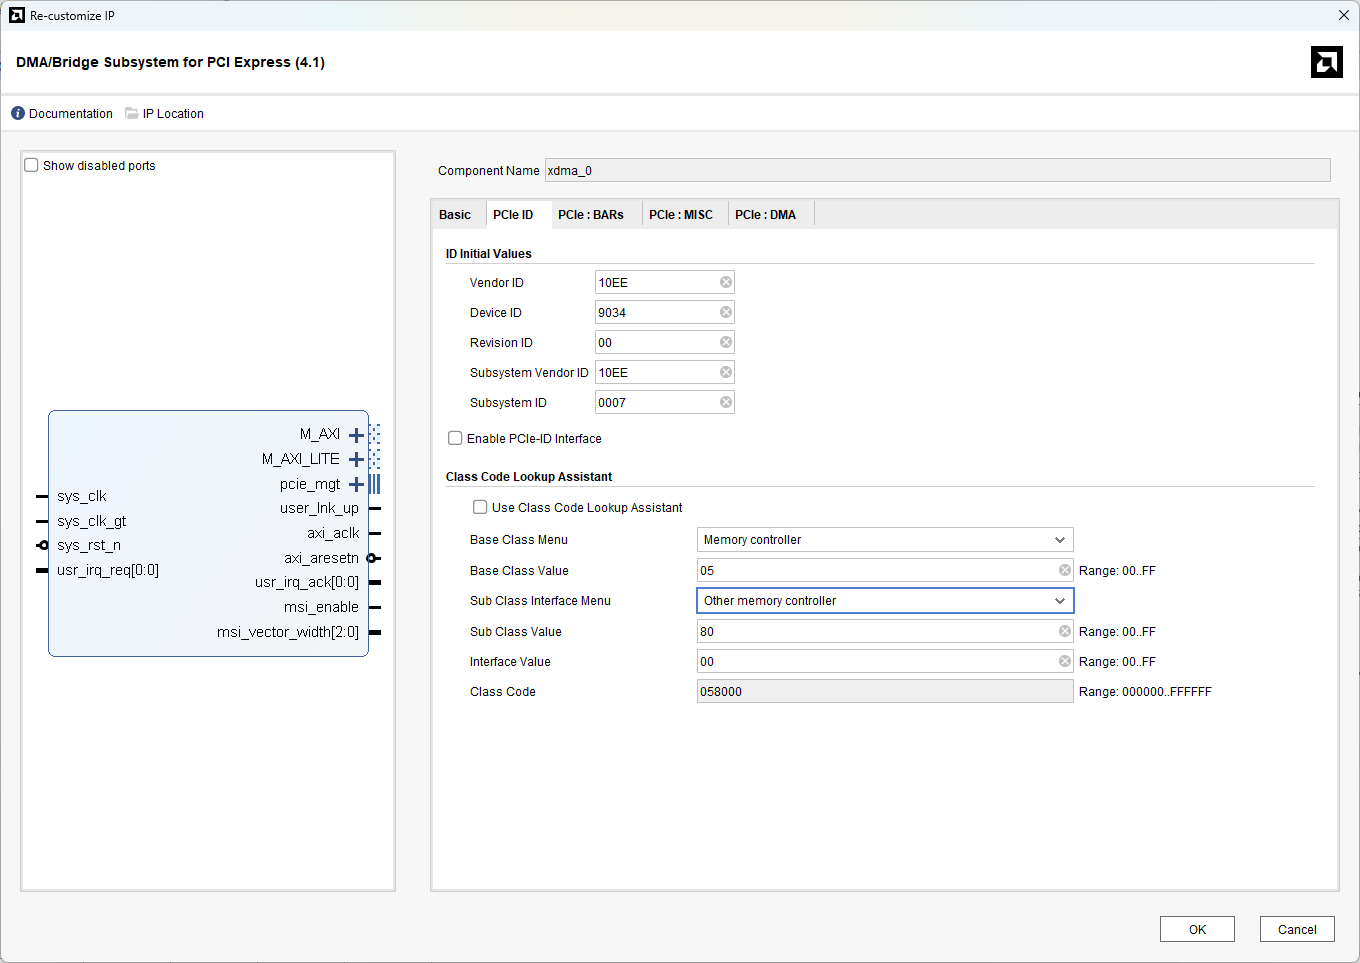
In step 6 of building the PCIe DMA design , apply the following minor change.
In the PCIe ID tab, change the Base Class Menu to "Memory controller" and the Sub Class Interface Menu to "Other Memory Controller".
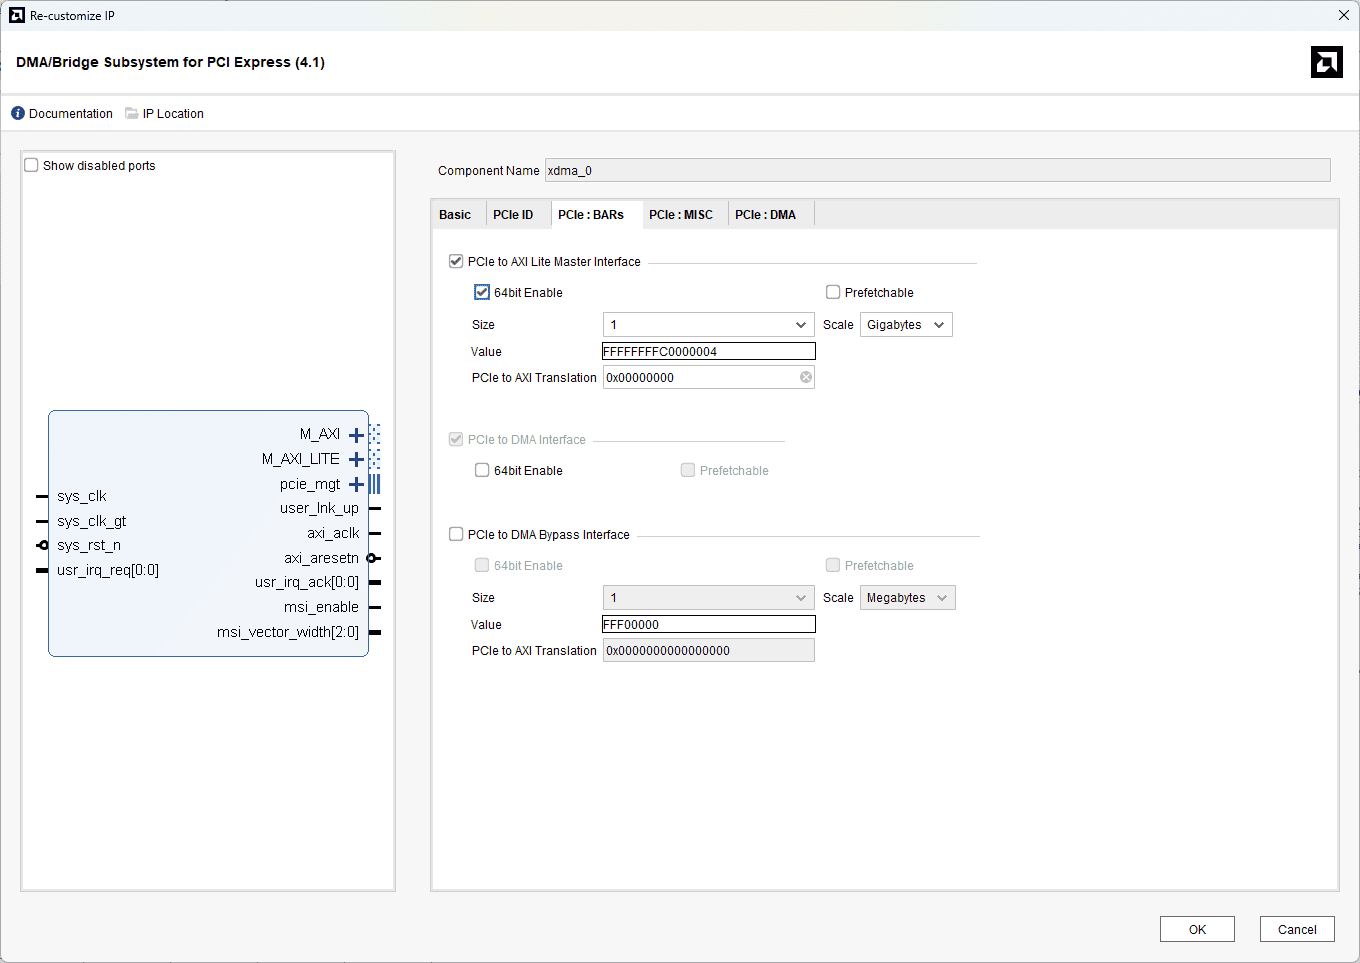
In the PCIe:BARs tab, enable the PCIe to AXI Lite Master Interface, 64 bit enable and change the scale to Gigabytes. And click OK.
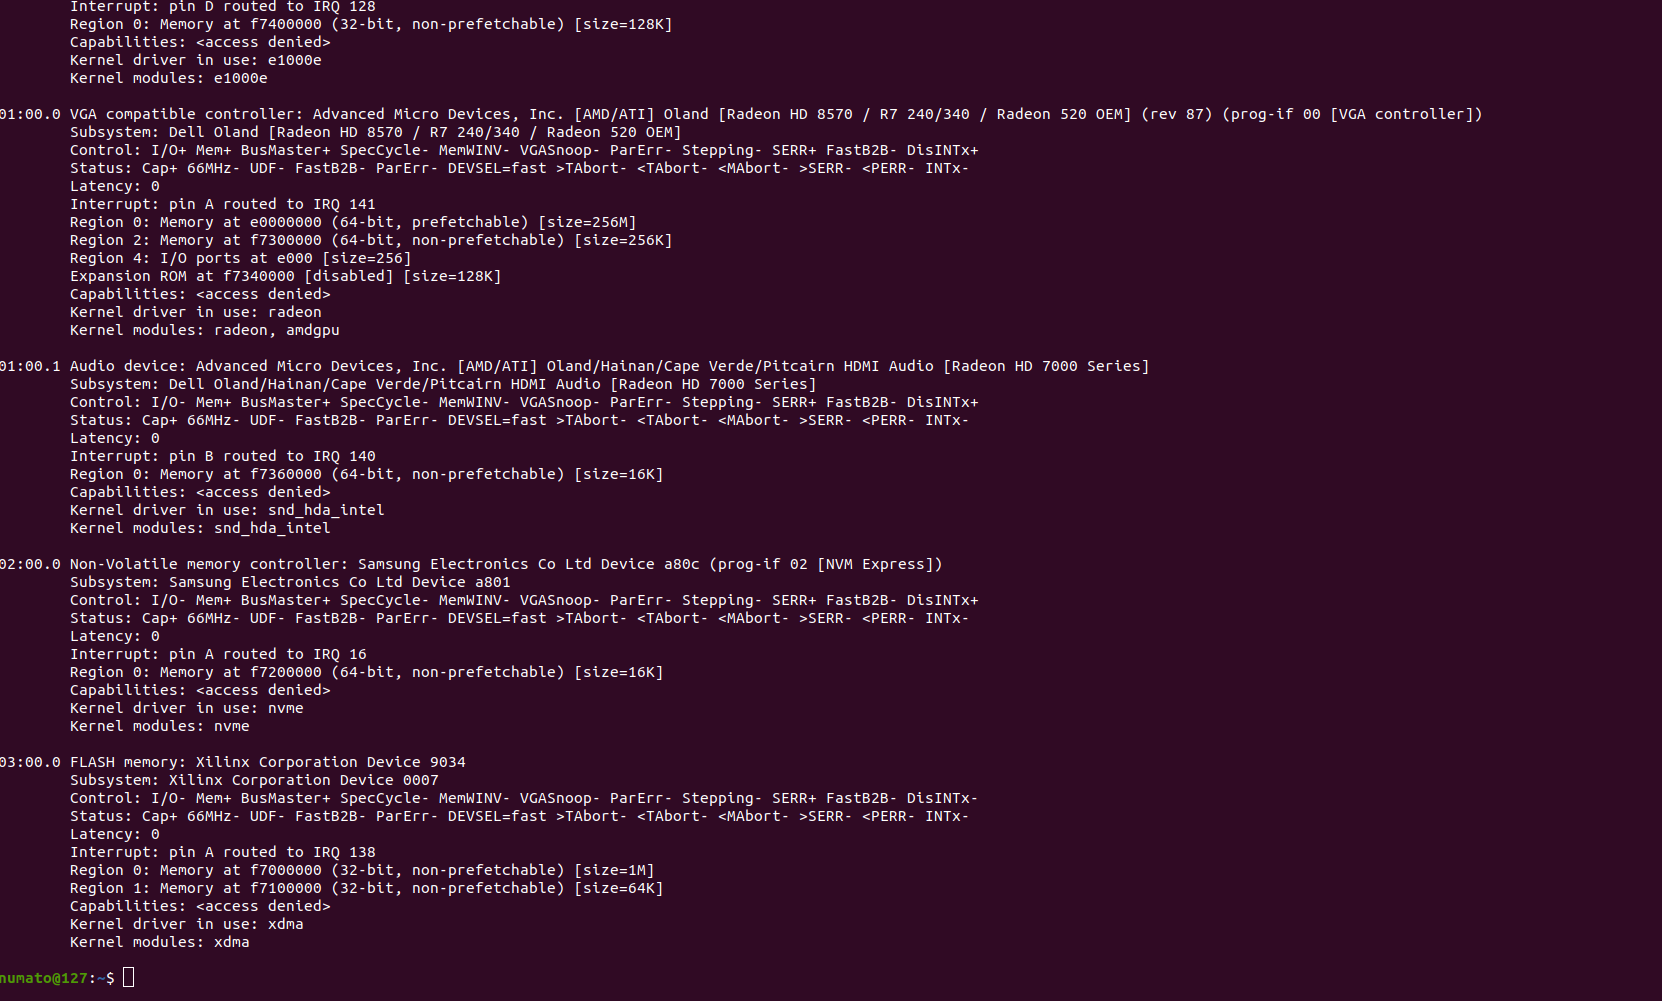
Note: Due to the modification in the PCIe:ID settings, your lspci -vv output will identify the device as a Flash Memory Controller, as mentioned earlier. After detecting the device, continue following the remaining steps in that section exactly as described.
Performing the PCIe speed test in Linux using the Aller AU-Plus.
Setting Up the Xilinx DMA IP Linux Drivers
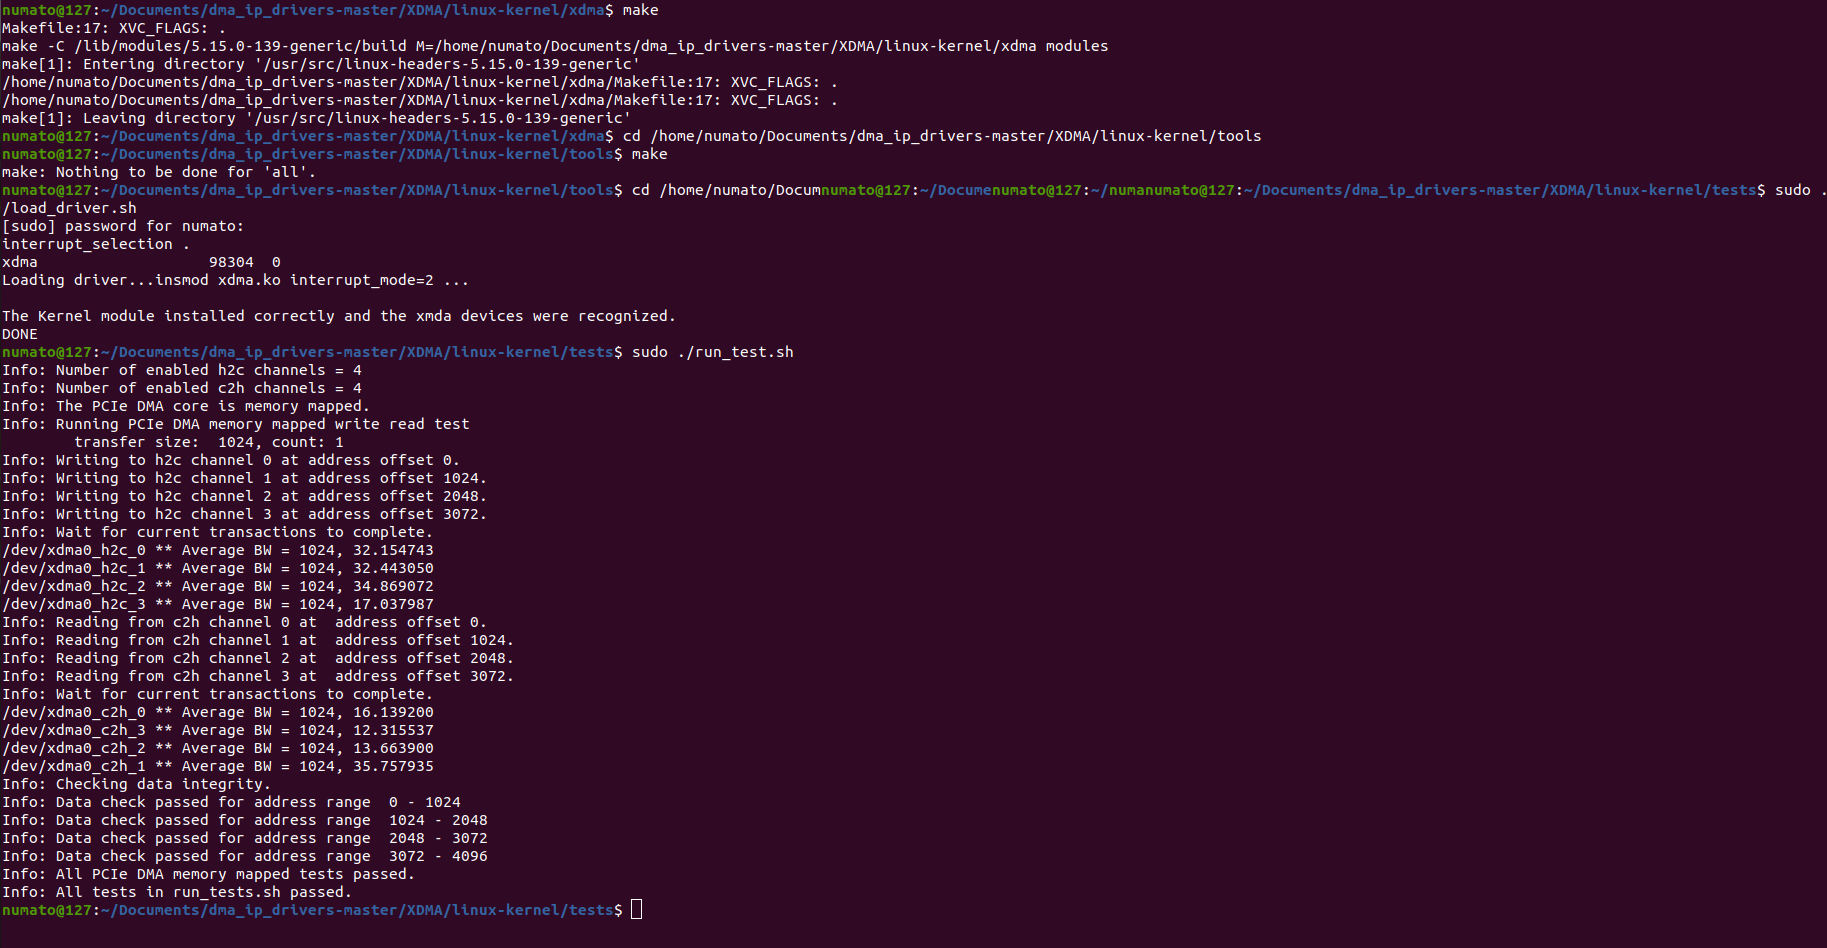
Download the dma_ip_drivers folder and extract it to a preferred location.
Navigate to:
XDMA → linux-kernel → xdma
and compile the driver using:
Next, go to the tools directory and run:
Then navigate to the tests directory and execute the following commands:
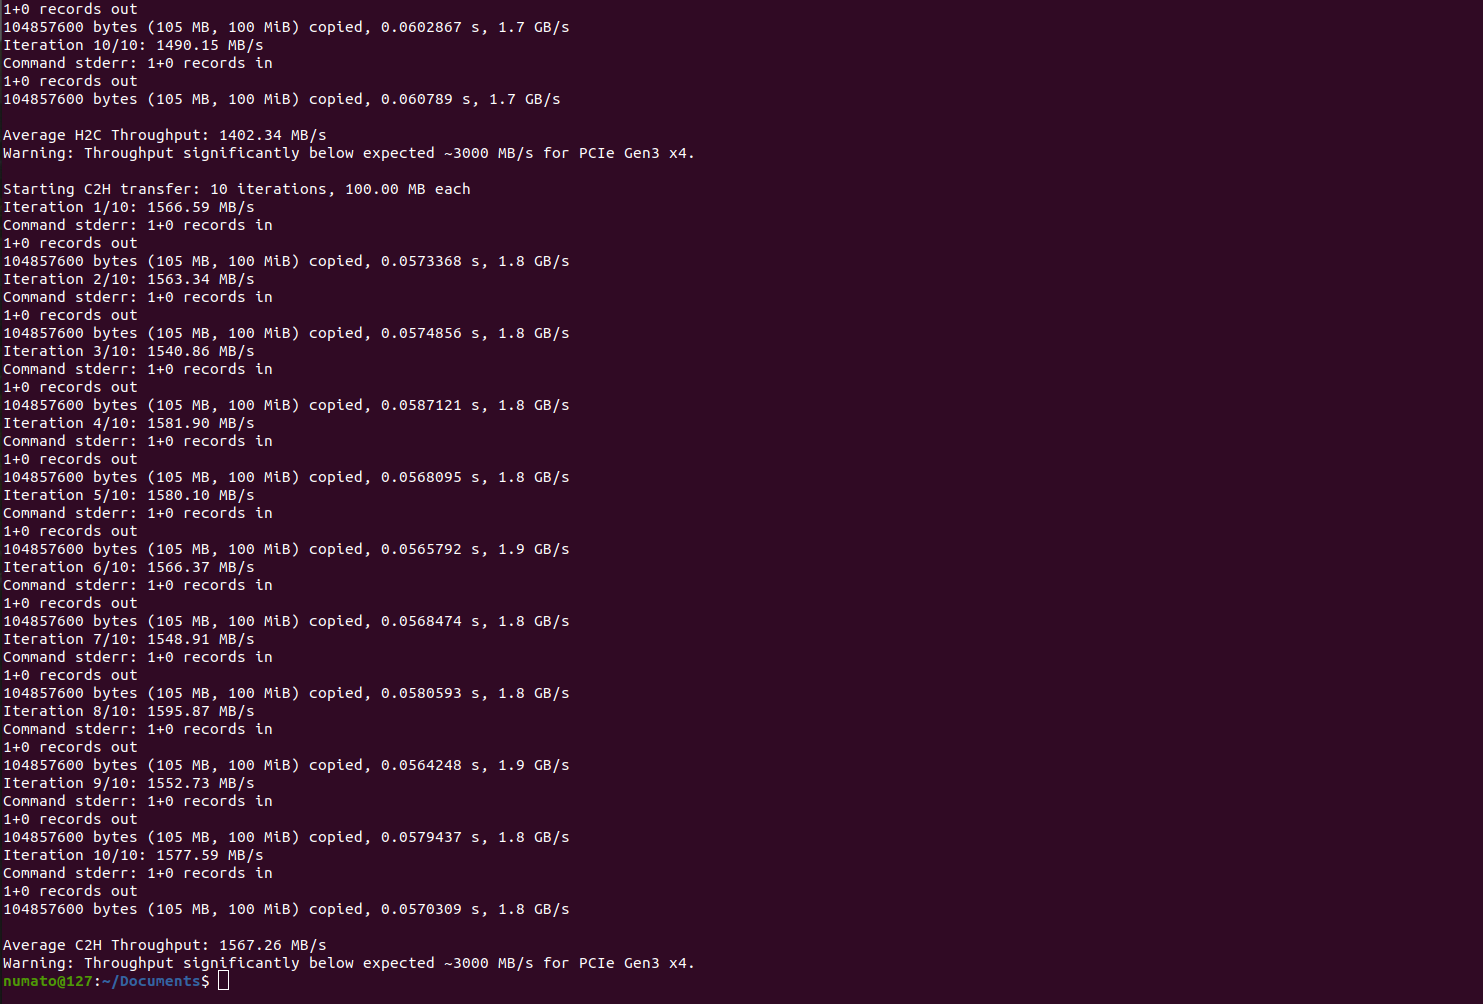
Running the PCIe DMA Throughput Test
To measure the PCIe DMA throughput, simply download the provided script and run “sudo python3 Aller_throughput_x4.py” command in the terminal. The script automatically performs the transfers and displays the calculated average throughput.
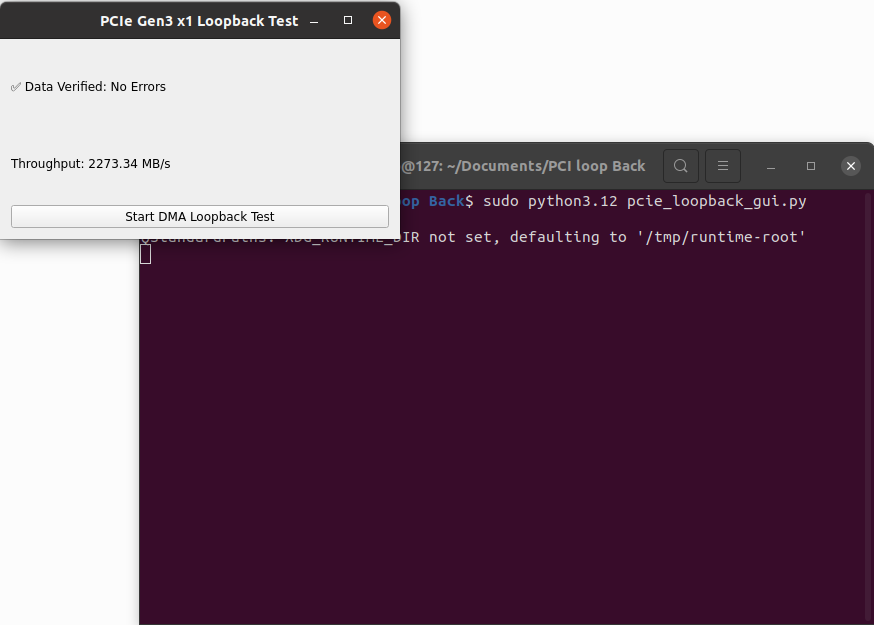
PCIe DMA Loopback Test
To perform the PCIe DMA loopback test, simply download the provided script and run “sudo python3 pcie_loopback_gui.py” command in the terminal. The tool writes 1 MB of data from the host to the FPGA (H2C), reads the same amount back from the FPGA (C2H), checks if the data matches, and displays the measured throughput.