How to Install PuTTY on Ubuntu Linux
Introduction
PuTTY is a popular terminal emulator for Windows, but it is not only limited to Windows operating system. Being free and open source, it is popular among Linux users too. PuTTY supports a wide range of protocols such as serial, SSH, Telnet, rlogin, SCP, SFTP etc. PuTTY is used by seasoned sysadmins and hobbyists/maker-crowd alike. Sysadmins generally use PuTTY as an SSH and telnet client whereas the Maker community widely uses PuTTY for interfacing with the serial ports on their hardware. PuTTY ships with a command line tool named “psftp”, the PuTTY SFTP client, which is used to securely transfer files between computers over an SSH connection. More about PuTTY here
This article will walk through on how to install PuTTY on Ubuntu 14.04 and higher.
The simplest way to install PuTTY in Ubuntu Linux is via terminal i.e, the command line. Follow the steps below to install PuTTY on Ubuntu.
Step 1
Login into Ubuntu Desktop. Press Ctrl + Atl + T to open GNOME terminal. If for some reason the shortcut didn’t work, run the Terminal from the Ubuntu Dash.
Step 2
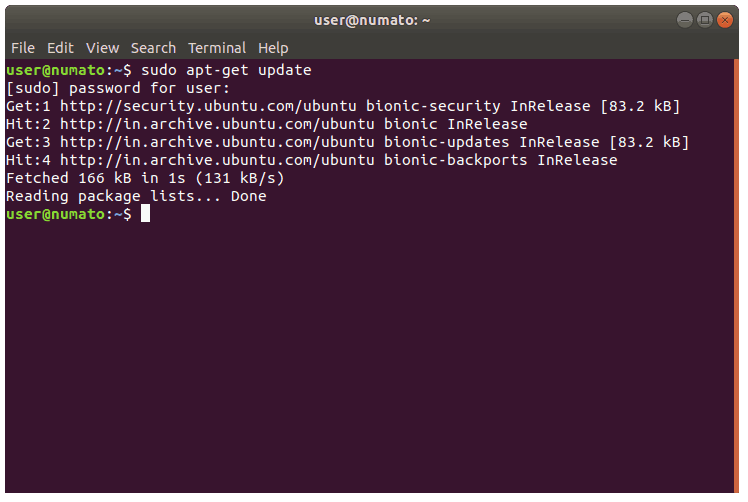
Run the following command in the terminal.
>> sudo apt-get update
This command updates the Ubuntu package list with latest one. If this command is skipped, there is a good chance that Ubuntu might install older version of the softwares instead of the latest version due to the fact that it only had the older list with older version of softwares. So, whenever installing new software or intending to upgrade the software versions, it is a good idea to run this command first. The sudo prefix at the start of the command instructs the terminal to run the command as root since installing and upgrading softwares is a privilege operation and should not be performed by users which do not have sufficient access. Provide the user password when prompted by sudo and hit Enter.
Step 3
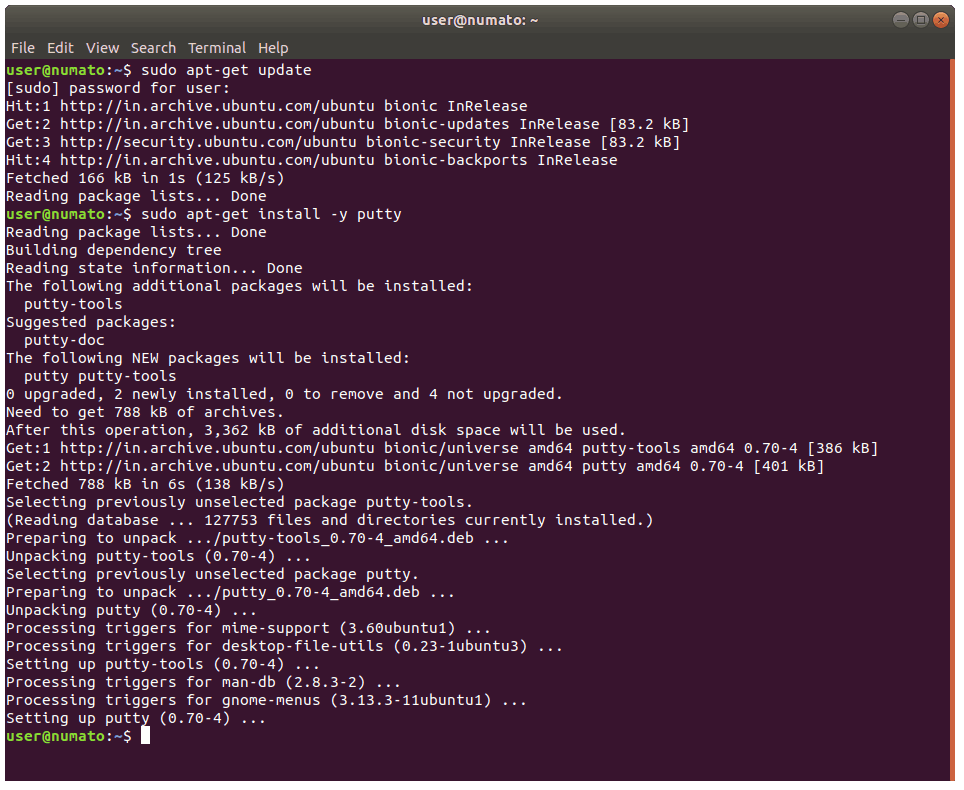
Install PuTTY using the command below.
>> sudo apt-get install -y putty
Step 4
PuTTY should be installed. Run it from the terminal using “putty” as command, or from the Dash.
>> putty
As visible in the PuTTY screenshot above, it provides a range of connection type to choose from: Raw, Telnet, Rlogin, SSH and Serial. It also ships with command line tools for SCP (pscp), SFTP (psftp), RSA and DSA key generator (puttygen) etc, which can be run from the terminal.
Optional: Compiling from source
While it is not recommended for beginners to compile PuTTY from source, one can choose to compile PuTTY from source. Download the PuTTY source files here. Extract the archive file using the command and follow the README file inside the archive to compile PuTTY from source.


thank you, It just wored
September 12, 2018 at 6:44 pmThanks
October 29, 2018 at 11:22 amThank you
December 12, 2018 at 9:34 amThanks you ! it worked .
December 31, 2018 at 3:57 pmThanks is really helpful
January 14, 2019 at 6:35 amcan it work to debian client.?
February 10, 2019 at 7:51 pmYes, it will work in Debian too.
February 25, 2019 at 4:22 amThanks….
June 12, 2019 at 11:07 amThanks man. I want to ask is there any external driver should be installed with puTTY to be able to work with some external devices or all the drivers are installed by default.
Thanks a lot.
June 24, 2019 at 12:28 pmthnaks it helped me
June 25, 2019 at 6:27 amIt has same look & fee windows version. Thanks!
July 4, 2019 at 6:32 amthanks
August 12, 2019 at 6:20 amThanks
March 15, 2020 at 7:56 pm