PYNQ Framework on TityraCore Zynq 7000 :
Enabling Smarter FPGA Designs
The PYNQ framework on TityraCore Zynq 7000 transforms FPGA development by providing a flexible and user-friendly approach to utilizing the power of adaptive computing. PYNQ (Python Productivity for Zynq) offers a seamless environment where developers can bypass traditional HDL complexities and interact directly with the programmable logic using high-level Python scripts and Jupyter notebooks. This empowers both novice and experienced developers to work efficiently on embedded system designs, leveraging TityraCore Zynq 7000, our custom Zynq FPGA board, to accelerate tasks like machine learning, real-time data processing, and rapid prototyping. By simplifying the interaction between hardware and software, PYNQ on TityraCore Zynq 7000 promotes a more accessible, collaborative, and efficient development process, enabling rapid experimentation and innovation across a wide range of applications. In this Blog, we explore how this powerful combination enhances productivity and flexibility in FPGA development, making it easier to push the boundaries of what is possible with Zynq-based systems.
What is PYNQ?
PYNQ (Python Productivity for Zynq) is an open-source framework developed by AMD that simplifies embedded system design on Zynq All Programmable Systems on Chips (APSoCs). By leveraging the Python programming language alongside a rich ecosystem of libraries, PYNQ enables developers to harness the full potential of both the FPGA fabric and ARM processing system within Zynq devices. Traditionally, FPGA development required expertise in hardware description languages (HDLs) like VHDL or Verilog. PYNQ eliminates this barrier, allowing users to control and interact with programmable logic through high-level Python scripts and Jupyter notebooks. This approach accelerates development workflows, making hardware design more accessible to software developers, researchers, and engineers without deep FPGA expertise.
The core of PYNQ revolves around FPGA overlays—pre-designed hardware libraries with Python APIs—that abstract the complexity of low-level hardware management. These overlays, combined with Python-based drivers, enable rapid prototyping and seamless integration with custom IP cores. PYNQ also provides a web-based architecture, powered by Jupyter, allowing users to interact with the FPGA through an intuitive, browser-based environment. This makes it ideal for applications in machine learning, image processing, real-time data analytics, and embedded systems development. By bridging the gap between software and hardware, PYNQ fosters a more productive and flexible FPGA development experience, particularly when deployed on custom platforms like the TityraCore Zynq 7000.
Benefits of using PYNQ on TityraCore Zynq 7000
- Enhanced Productivity: Simplifies FPGA development with Python, reducing the need for complex HDL coding.
- Seamless Hardware-Software Co-Design: Enables smooth integration of hardware and software using robust APIs and overlays.
- Accelerated Performance: Boosts speed for data-intensive tasks by offloading computations to FPGA hardware.
- Flexibility and Scalability: Supports dynamic hardware reconfiguration without system reboots, enhancing adaptability.
- Comprehensive Ecosystem: Offers Python libraries, overlays, and Jupyter Notebook for fast development and debugging.
- Rapid Prototyping: Ideal for quick experimentation, algorithm testing, and real-time validation.
- Open-Source Advantage: Backed by a strong community with extensive documentation and reusable IP resources.
Getting Started with PYNQ on TityraCore Zynq 7000
Prerequisites:
- TityaCore Zynq 7000 SoC SODIMM
- TityraCore SoC Carrier
- MicroSD Card (with at least 8GB capacity)
- Ethernet Connection
- 12v Dc supply (For powering up the board)
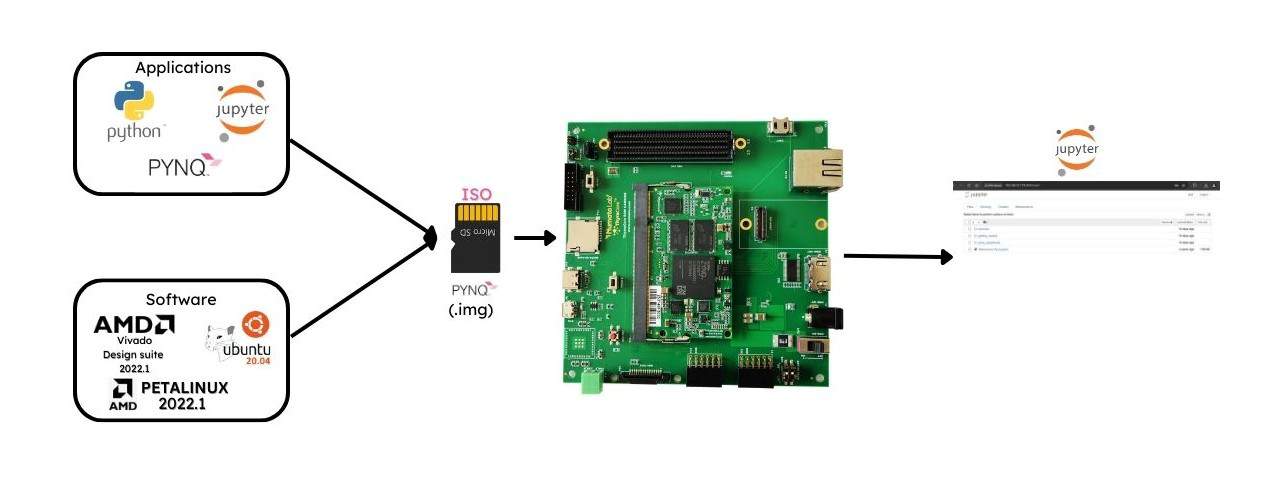
Step 1: Download the PYNQ image for the TityraCore Zynq 7000.
Step 2: Flash the PYNQ image to the microSD card using tools like BalenaEtcher or Win32DiskImager.
Step 3: Insert the flashed microSD card into the TityraCore Zynq 7000 and configure the boot mode to SD boot mode as detailed in the user manual.
Step 4: Power on the board after configuring it to SD boot mode.
Step 5: Connect the board to an Ethernet network (ensure both the board and your PC are on the same subnet).
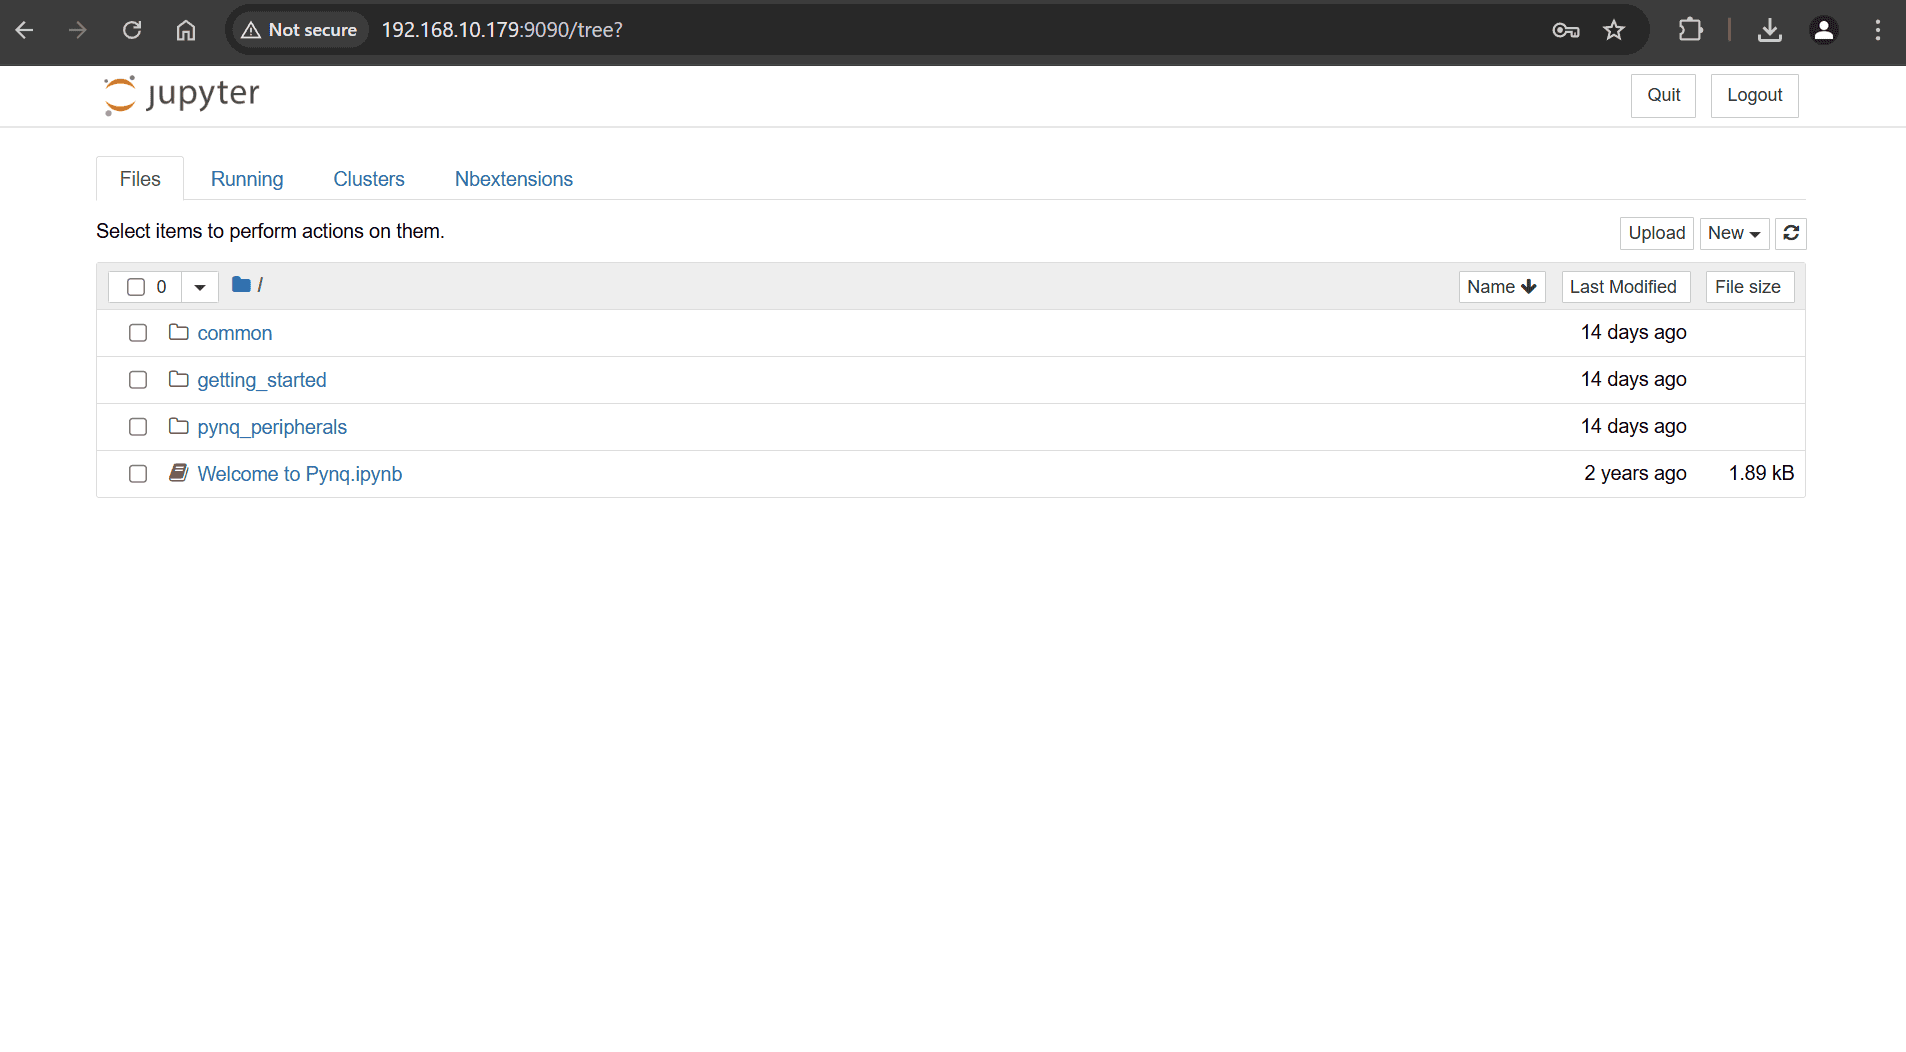
Step 6: Once the board successfully boots from the SD card (you can monitor the boot process via UART), open a web browser and navigate to PYNQ:9090.
Step 7:Login with the following credentials:
- Username:
xilinx - Password:
xilinx
Step 8: Upon entering the password, you will have access to the Jupyter Notebook.
Stay tuned for upcoming application projects involving the PYNQ framework.